Hi @sahil ,
You made a mistake in the first step, you should press ‘q’ to exit instead of using Ctrl + c.
One more thing: please use python3 to run the sample code.
Hi @sahil ,
You made a mistake in the first step, you should press ‘q’ to exit instead of using Ctrl + c.
One more thing: please use python3 to run the sample code.
Hi,
The arducamstill supports for online debugging, will revert to the default value after exit.
So when you exit the arducamstill and run the python demo, it will user the default value.
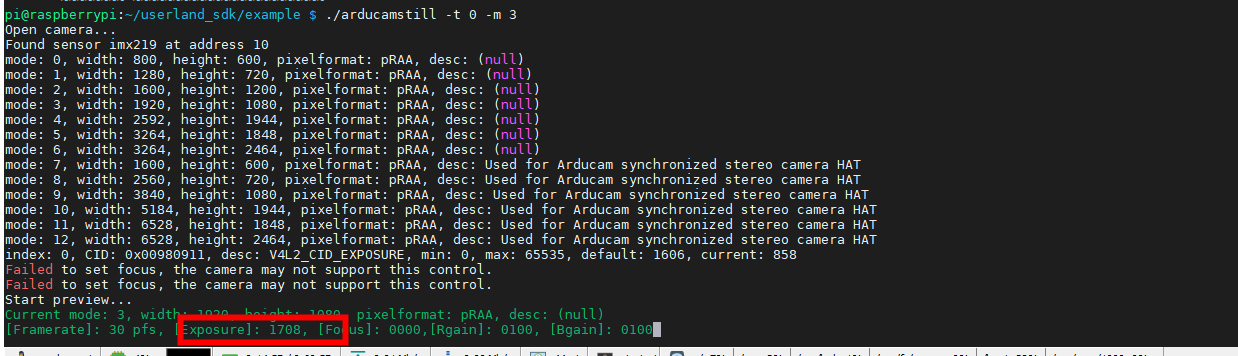
I advise you using arducamstill to fine tune the image, then remember the value of each parameters. Each parameter’s value will display as the below image shows.
Then you can use the set_control API to set the suitable values referring the images I attached for you:
About the image is green, have you enable the awb function?
Referring code:
print(“Enable Auto White Balance…”)
camera.software_auto_white_balance(enable = True)
Let me know if you need more help.
Hi Wong,
Good morning and thank you, ok now 2_chess_cycle.py is working with python3. I did try that before I posted a comment on this forum but could not get it to work. so I kept with the instructions in the readme of using python and not python3.
I am having strange behaviour, now 2_chess_cycle.py is working (with python3) but the command ./arducamstill in ~/MIPI_Camera/RPI isnt opening the camera. This has been like that for 2-3 minutes with no image from the camera.
pi@raspberrypi:~/MIPI_Camera/RPI $ ./arducamstill -t 5000 -m 1 -e jpg -o test.jpg Open camera... Found sensor imx219 at address 10 mode: 0, width: 800, height: 600, pixelformat: pRAA, desc: (null) mode: 1, width: 1280, height: 720, pixelformat: pRAA, desc: (null) mode: 2, width: 1600, height: 1200, pixelformat: pRAA, desc: (null) mode: 3, width: 1920, height: 1080, pixelformat: pBAA, desc: (null) mode: 4, width: 2592, height: 1944, pixelformat: pRAA, desc: (null) mode: 5, width: 3264, height: 1848, pixelformat: pRAA, desc: (null) mode: 6, width: 3264, height: 2464, pixelformat: pRAA, desc: (null) mode: 7, width: 1600, height: 600, pixelformat: pRAA, desc: Used for Arducam synchronized stereo camera HAT mode: 8, width: 2560, height: 720, pixelformat: pRAA, desc: Used for Arducam synchronized stereo camera HAT mode: 9, width: 3840, height: 1080, pixelformat: pRAA, desc: Used for Arducam synchronized stereo camera HAT mode: 10, width: 5184, height: 1944, pixelformat: pRAA, desc: Used for Arducam synchronized stereo camera HAT mode: 11, width: 6528, height: 1848, pixelformat: pRAA, desc: Used for Arducam synchronized stereo camera HAT mode: 12, width: 6528, height: 2464, pixelformat: pRAA, desc: Used for Arducam synchronized stereo camera HAT index: 0, CID: 0x00980911, desc: V4L2_CID_EXPOSURE, min: 0, max: 65535, default: 1606, current: 1000 len = 8 name= test.jpg Can't open the file mmal: Failed to fix lens shading, use the default mode! Failed to set focus, the camera may not support this control. Failed to set focus, the camera may not support this control. Start preview... Current mode: 1, width: 1280, height: 720, pixelformat: pRAA, desc: (null) mmal: Enable JPEG encoder.
Hi Again, also why doesn’t the focus function work?
Hi,
After you have set camera.software_auto_white_balance(enable = True)
Please add some delay to wait the awb stable.
Can you attach me some image you get?
Hi Bin,
I have added auto-exposure and auto white balance along with a time delay of 0.01 seconds within the function “def get_frame (camera):”, within the stereo_depth_demo samples provided, as the first think the program does. So it works, it is a little bit red but that’s a smaller issue than a completely green image.
Am I correct that I would need to add the auto white balance to all of the source files that are capturing an image?
How do I correct for the image coming upside down on screen?
I am still unable to run the simple examples in ~/MIPI_Camera/RPI such as “preview-dualcam” and “capture-dualcam” , I get the text “Open camera… , init camera status = 4100, open camera, init camera status = 4100” and then it exits the program.
Hi Bin,
I got the awb to work with the python code! thanks! I am not trying to run 4_calibration.py but get this:
python3 4_calibration.py
Traceback (most recent call last):
File “4_calibration.py”, line 26, in <module>
import cv2
File “/usr/local/lib/python3.7/dist-packages/cv2/init.py”, line 3, in <module>
from .cv2 import *
ImportError: libjasper.so.1: cannot open shared object file: No such file or directory
I am attaching my paired images as well just in case.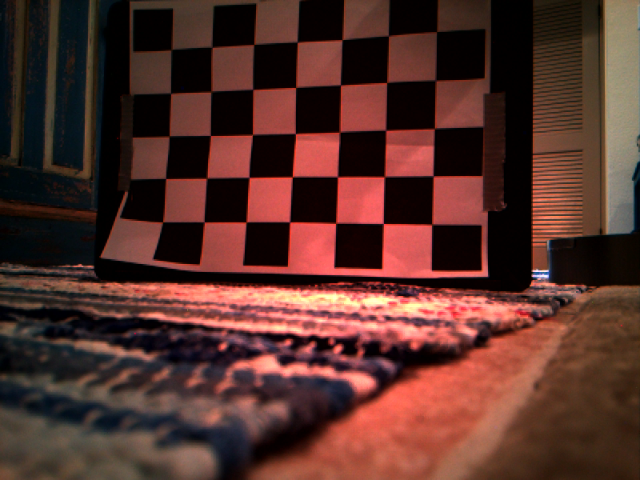
Thanks again!
Tom
Hi Bin,
I got the awb to work within pythode code! Thanks!
Now when I try to run the 4_calibration.py, I get this:
python3 4_calibration.py
Traceback (most recent call last):
File “4_calibration.py”, line 26, in <module>
import cv2
File “/usr/local/lib/python3.7/dist-packages/cv2/init.py”, line 3, in <module>
from .cv2 import *
ImportError: libjasper.so.1: cannot open shared object file: No such file or directory
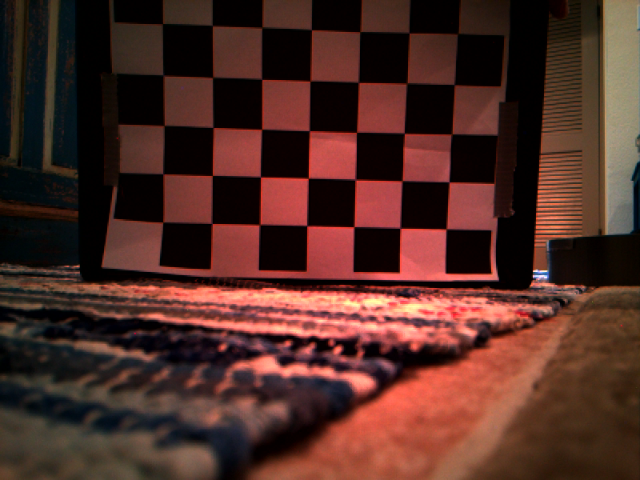
Here is one of my checkerboard images:
Hi,
Great to hear that. You just need to add once auto white balance enable after you have open the camera. Expect you close the camera, you don’t need to add awb_white _balance in each get image.
“preview-dualcam” and “capture-dualcam” those demos are used on CM3 platform instead of Pi mode 3b.
About the image coming upside down on screen, Can you attach me a image? It need to update our lib to rotate the direction, which is not easy. It may influence the bayer’s order.
Let me know if you need more help.
Hi @toppenhe
Our engineer has replied you here https://www.arducam.com/forums/topic/python-scripts-not-working/?bbp_reply_to=22608&_wpnonce=5124866dd4
Hi Bin,
Ok so from what I read in your response I need to find the function that opens the camera, not the function that takes the photo “def get_frame (camera):”. ok I will do that.
The image from the cameras are upside down. So for example can of cola is upside down in the image.
physically the dual camera modul UC506 is positioned so that the cables are pointing down to the ground and the letters identifying the two cameras are correct side up, i.e. they read like [B] for the left camera and [A] for the right camera where right and left are as you look at the module UC506. 
Hi Bin,
I think i understand what you mean by only having AWB set in the function that opens the camera and not the function that takes the snapshot.
Please see output from the camera, still a bit red from the AWB but also very much upside down. I have the camera module UC506 so that the ribbon cables are going down and into the UC625 module (the letters B and A on the camera module are reading the correctly (i.e. not upside down).

@Bin, Hi Bin, see upside down image.
Hello, OK, I have got your message. I will try to help you rotate the image next week.
Waitting me good news.
Hello,
I have added imx219 hflip and vflip control. Please download our new lib
Then you can control the both hflip and vflip to rotate the direction.

Let me know if you need more help.
Hi Bin,
Fantastic, thank you. What programs/libraries are the hflip and vflip commands in?
Thank you again.
Hi again Bin, I just deleted and re-downloaded the github repository and compiled everything and the images are still upside down.
Hello,
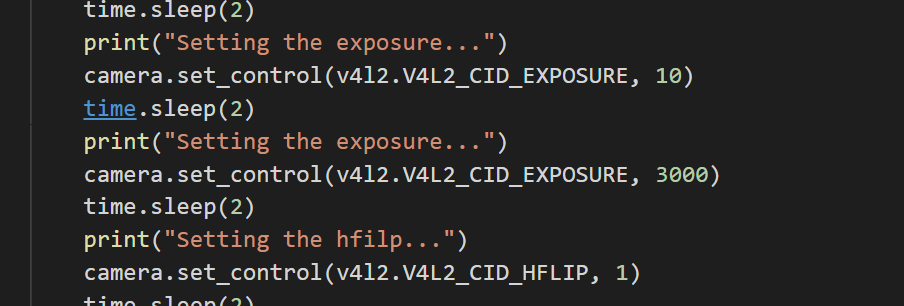
Just like setting the auto awb function, you just need to add arducam_set_control(camera_instance, V4L2_CID_HFLIP, 1)
and
arducam_set_control(camera_instance, V4L2_CID_VFLIP, 1)
after you have init the camera.
Hello @lvbin , I am also trying to get my dual IMX219 camera flipped. I modified the 1_test.py as follows (starting at #ea):
def select_mode(camera):
    fmts = camera.get_support_formats()
    modes = []
    for fmt in fmts:
        desc = fmt['description']
        if desc.find(b'stereo camera') > 0 if desc != None else False:
            modes.append(fmt['mode'])
            print("mode: {}, width: {}, height: {}".format(fmt['mode'], fmt['width'], fmt['height']))
    mode = input_number(modes)
    camera.set_mode(mode)
    fmt = camera.get_format()
    print("Current mode: {},resolution: {}x{}".format(fmt['mode'], fmt['width'], fmt['height']))
    try: # ea
        print("Enable Auto Exposure...")
        camera.software_auto_exposure(enable = True)
        print("Enable Auto White Balance...")
        camera.software_auto_white_balance(enable = True)
        camera.arducam_set_control(camera_instance, V4L2_CID_HFLIP, 1)
        camera.arducam_set_control(camera_instance, V4L2_CID_VFLIP, 1)
    except Exception as e:
        print(e)
The exposure and AWB appears to work, at least it looks better that without. But the flip lines do not work, can you please be more precise than above, exactly how to insert the commands?
EDIT: now I tried:
camera.set_control(arducam.V4L2_CID_HFLIP, 1)
camera.set_control(arducam.V4L2_CID_VFLIP, 1)
but I get:
module ‘arducam_mipicamera’ has no attribute ‘V4L2_CID_HFLIP’
Thank you!
Ethan
Don’t worry. Please attach us your whole code and we will help you test.