Hello all, I’m running into an issue with my PTZ 8mp camera kit. It uses the IMX219 sensor. We have legacy stack turned on for the camera to work with our robot control scripts. The camera is detected and supported, but it will not take an image with raspistill. It comes up error. I have followed the directions but cannot get opencv to compile on the 3B. But all other direction I have implemented. With exception to the config.txt editing. In my Bullseye(latest release) config, I can’t seem to find the entries. I came across another post were the determination was he had a bad camera. I have swapped ribbon cables, moved to a 4B on the bench. (Easier than working around the robot.) I’m really at a lose. I have emailed sales@Arducam as instructed for legacy users, maybe I’m missing something. Any help would absolutely be appreciated.
This is my exact error. Sorry if I was being abit vague before, at work here now but will get any info required to diagnose issue once off.
Thanks again.
Thank you very much for the response, last night I was at the camera again. I did a fresh install of Raspian Bullseye running on a Pi4B. I purchased my camera from the Robotshop.ca and this is the link to my camera.
I followed these instructions:
https://docs.arducam.com/Raspberry-Pi-Camera/Pan-Tilt-Zoom-Camera/quick-start/
For reference, the python-opencv command fails, but if you use python3-opencv it will install.
The FocuserExample.py also fails with a bunch of errors.
I also followed the Readme.txt file in the PTZ-Camera-Controller.git. The opencv fails with the sudo apt-get install python-opencv. Change to Python3-opencv it will install.
Focuser/FocusorExample.py fail to run after install.
Also note: The Readme file has me change the config.txt
My config.txt looks nothing like what I was supposed to change, my config.txt has under the
#Auto load Camera overlays(might not be exact as I’m not in front of my PI Currently)
StartX=1
Changed this to Camera-Auto Detect=0 and added dtoverlay-imx219 below that. removed the startX=1 all together. No joy.
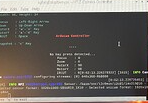
So with Libcamera-hello I’ll get a extremely blurred image. When I use vcgencmd get_camera it says non detected, none supported. Libcamera support=0
Ok, I think I hit all the relevant points, I have changed ribbon cables a dozen times, changed back and forth between cameras to confirm that the cables work. The PTZ board is hooked directly to the PI as per the diagram on the Quick start - Arducam Wiki
I’m really at a loss here. but I did read the forum post rules so I think I hit all the questions required. If you need anything else please ask or want me to try something I will. I have a fresh up to date install of Bullseye for this evenings testing. ![]()
Can you send me this error message?
Sorry,I will correct this part of the textbook
The new version no longer uses this command to view
You can check the status with the following command
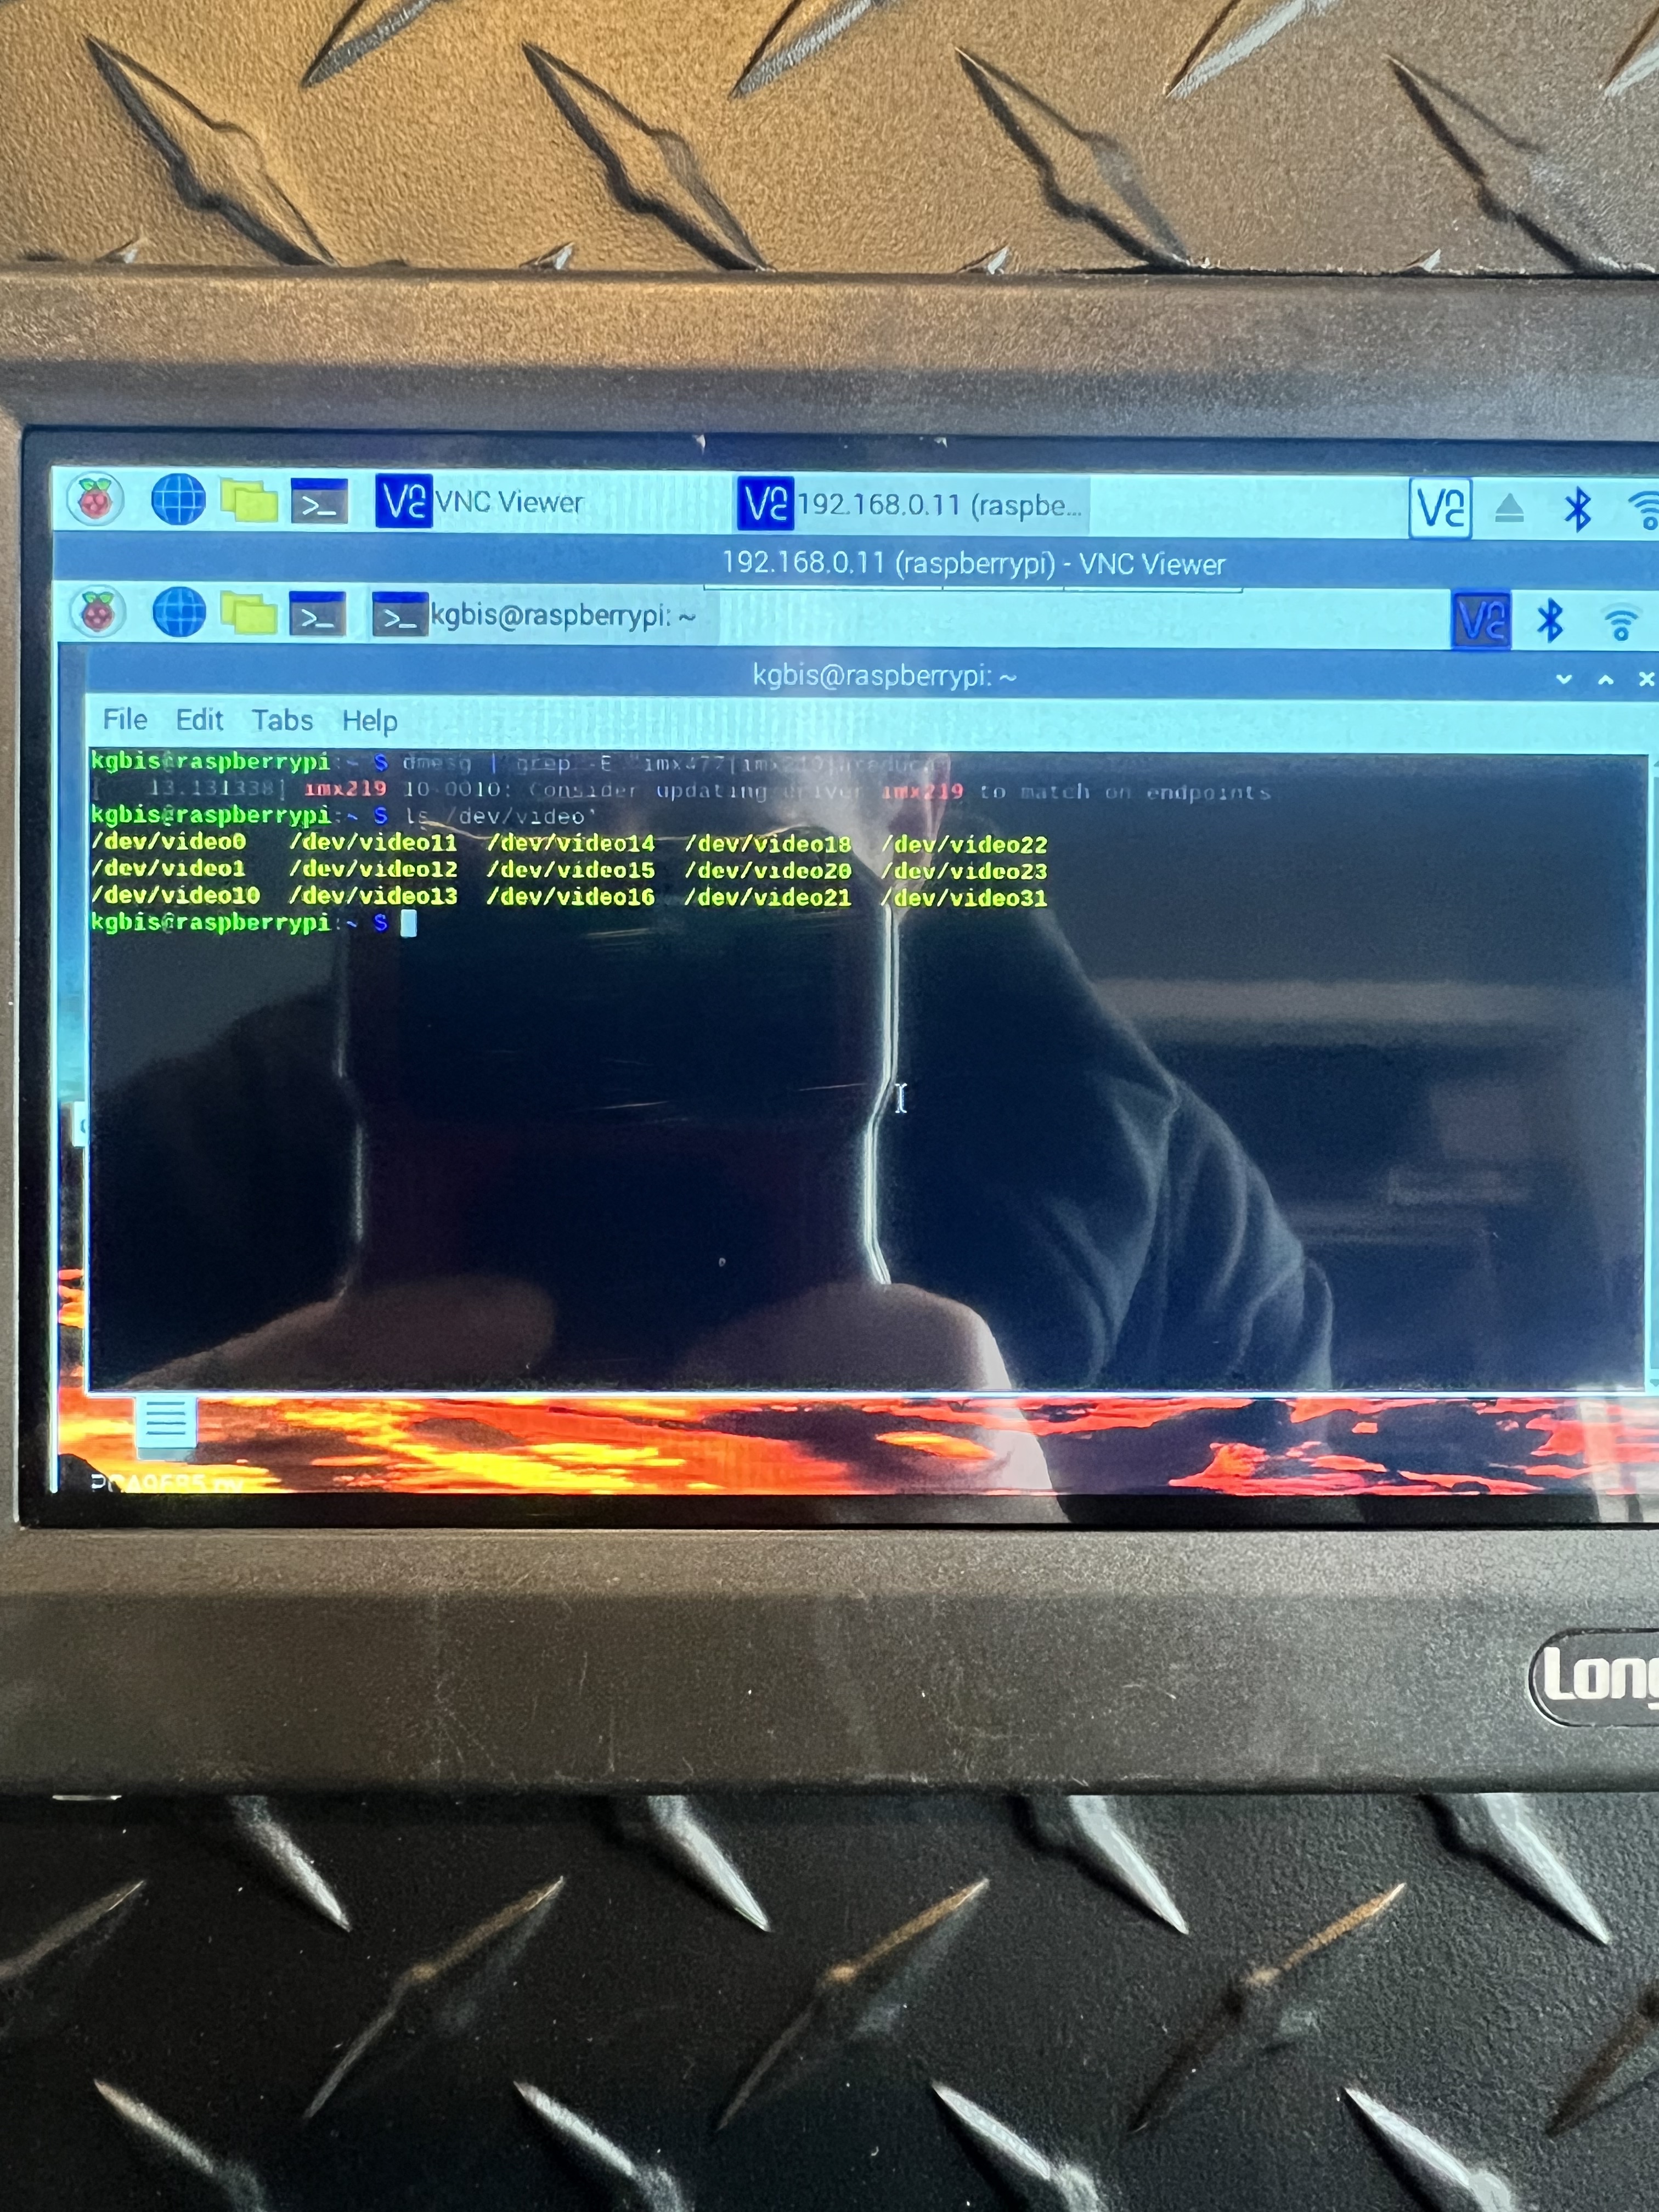
ls /dev/video0
dmesg | grep imx477
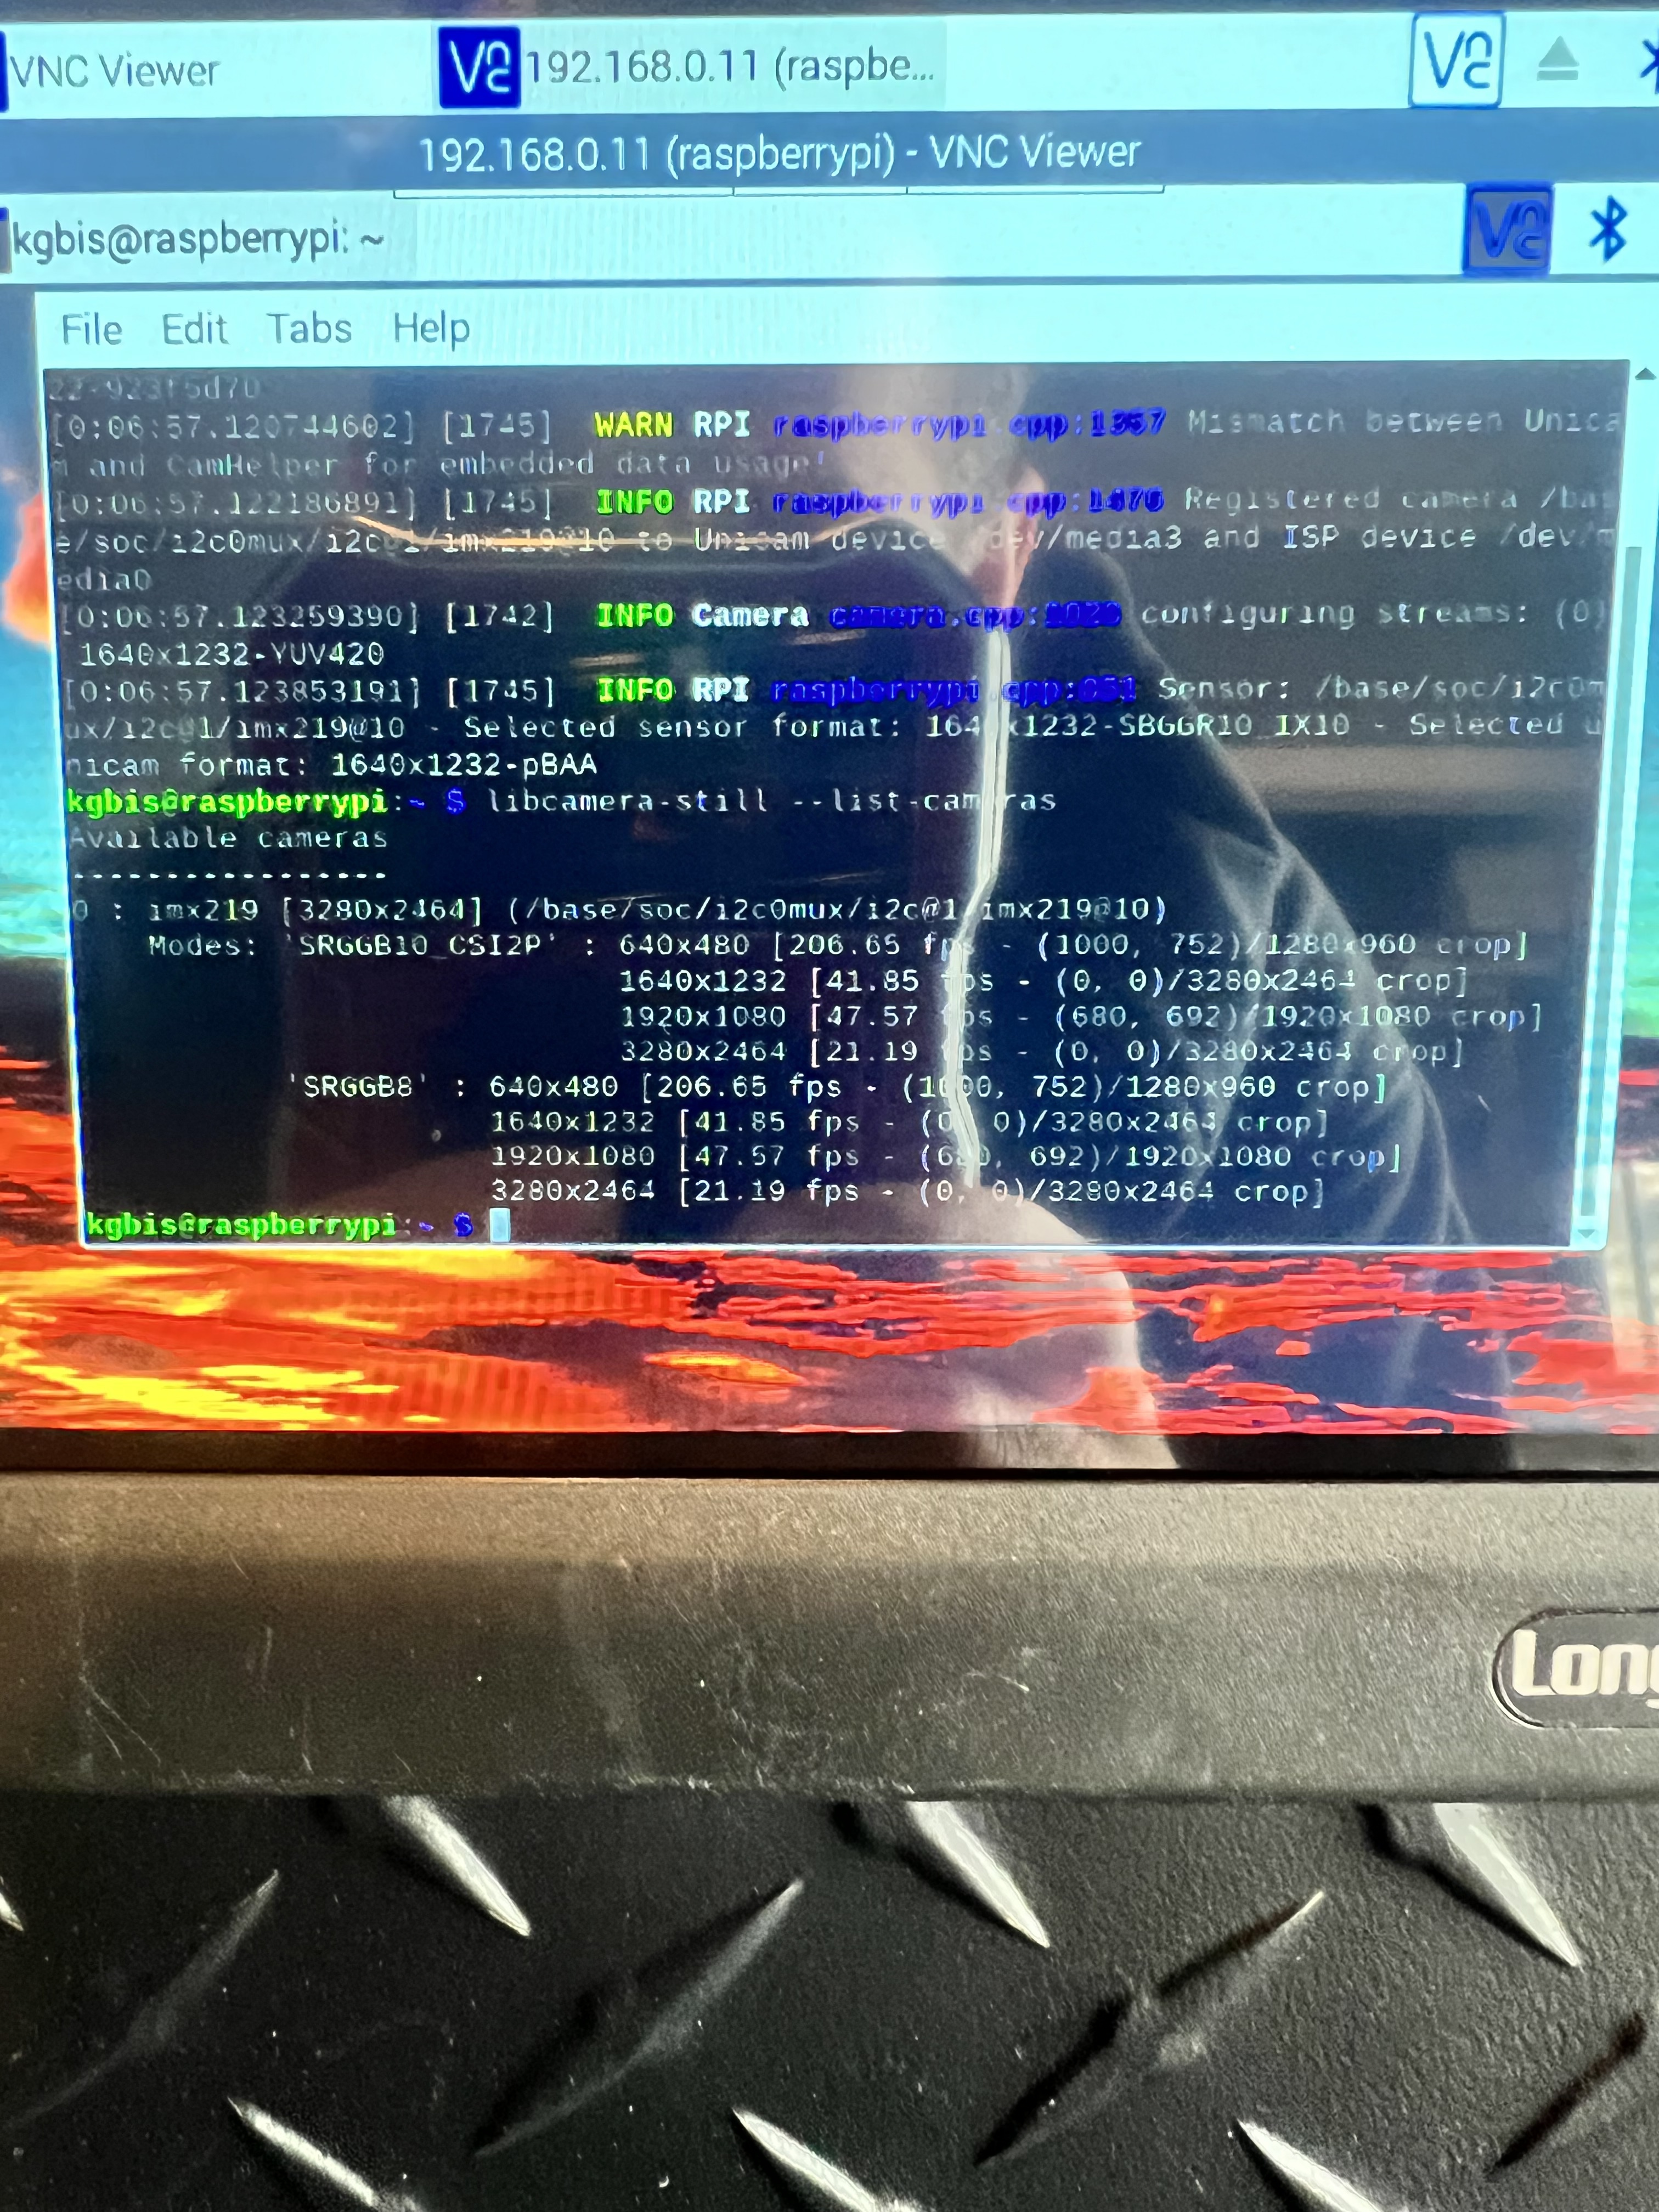
libcamera-still --list-cameras
You can refer to this part
https://docs.arducam.com/Raspberry-Pi-Camera/Native-camera/Troubleshooting/

According to your current state, the camera can work normally, so you don’t have to worry about flexible cables. There should be some problems with the servo part.
thank you again for the reply, I never had a chance to get it it last night but Have taken the day off from work to get at this full time, currently fighting to install opencv.
I used pip install opencv-python and it failed with this error
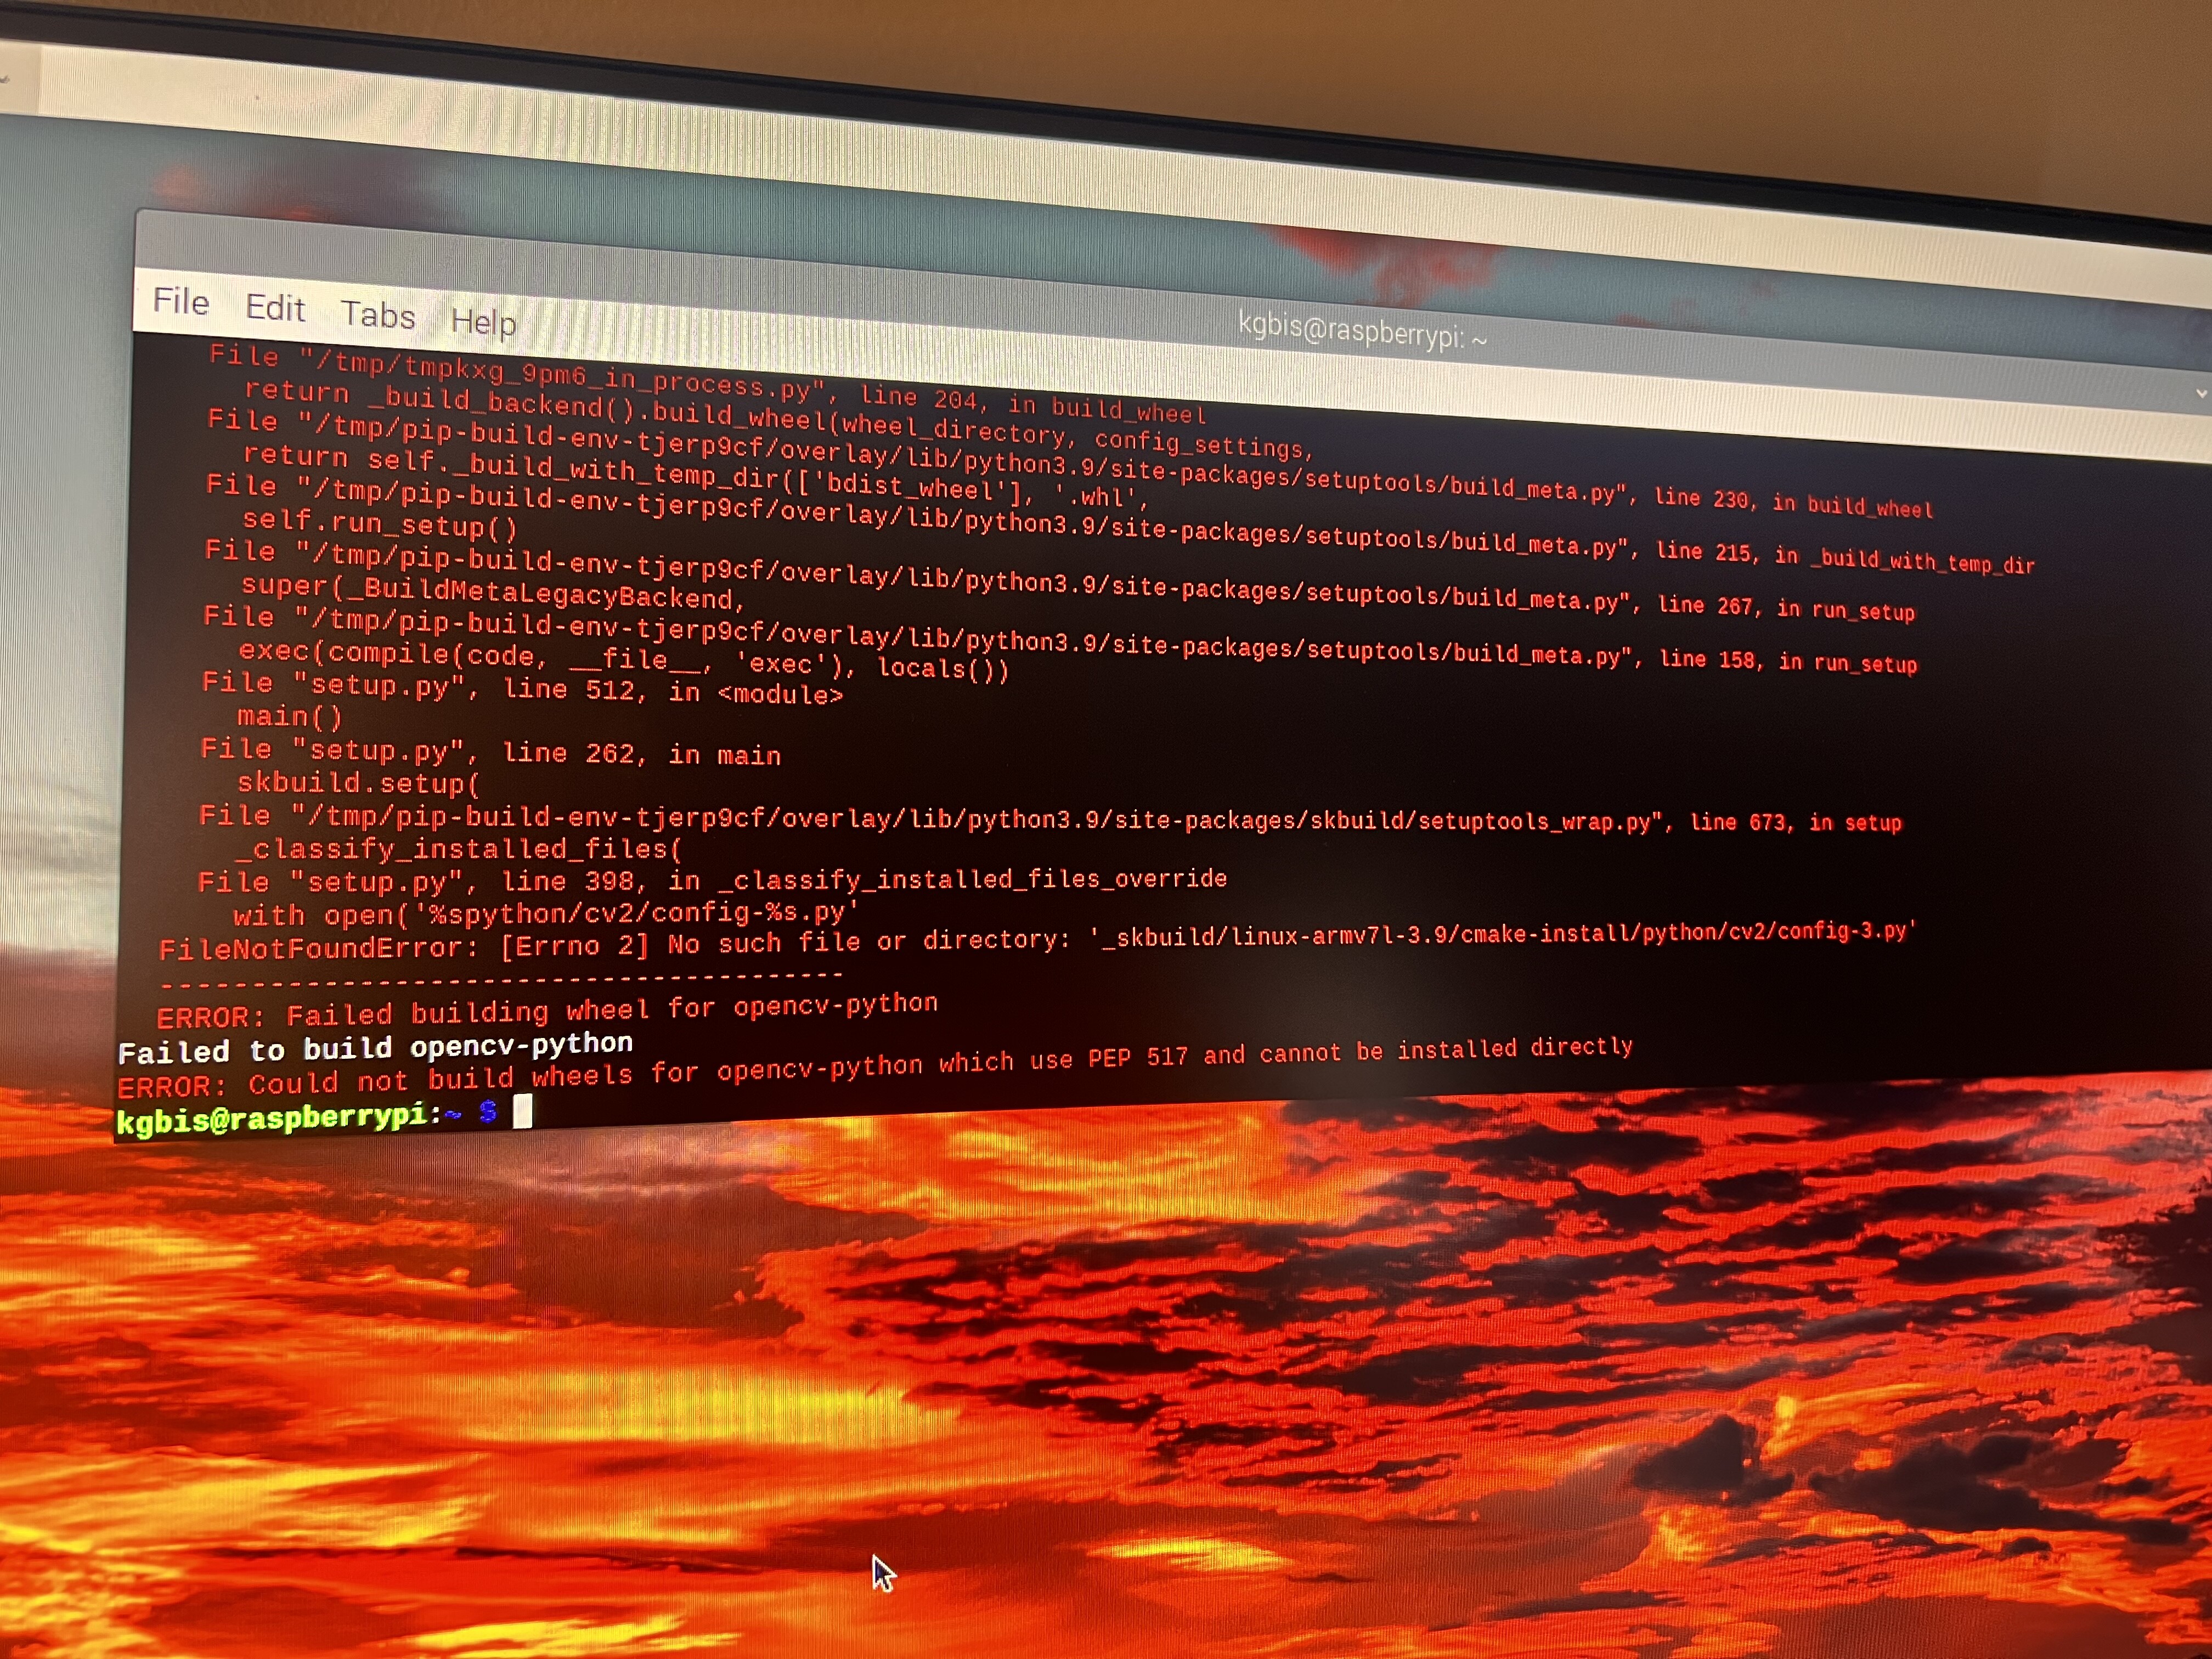
I managed to get open v to install using this command:
Pip install opencv-python==4.5.3.56
As per the tutorial Installing OpenCV | The Raspberry Pi Guide
When testing opencv as per guide it fails to open cv2.
I am trying to upgrade to 4.7.0.72 via sudo pip3 install opencv-python.
I will keep posting updates as I move forward, but step one is fighting again.
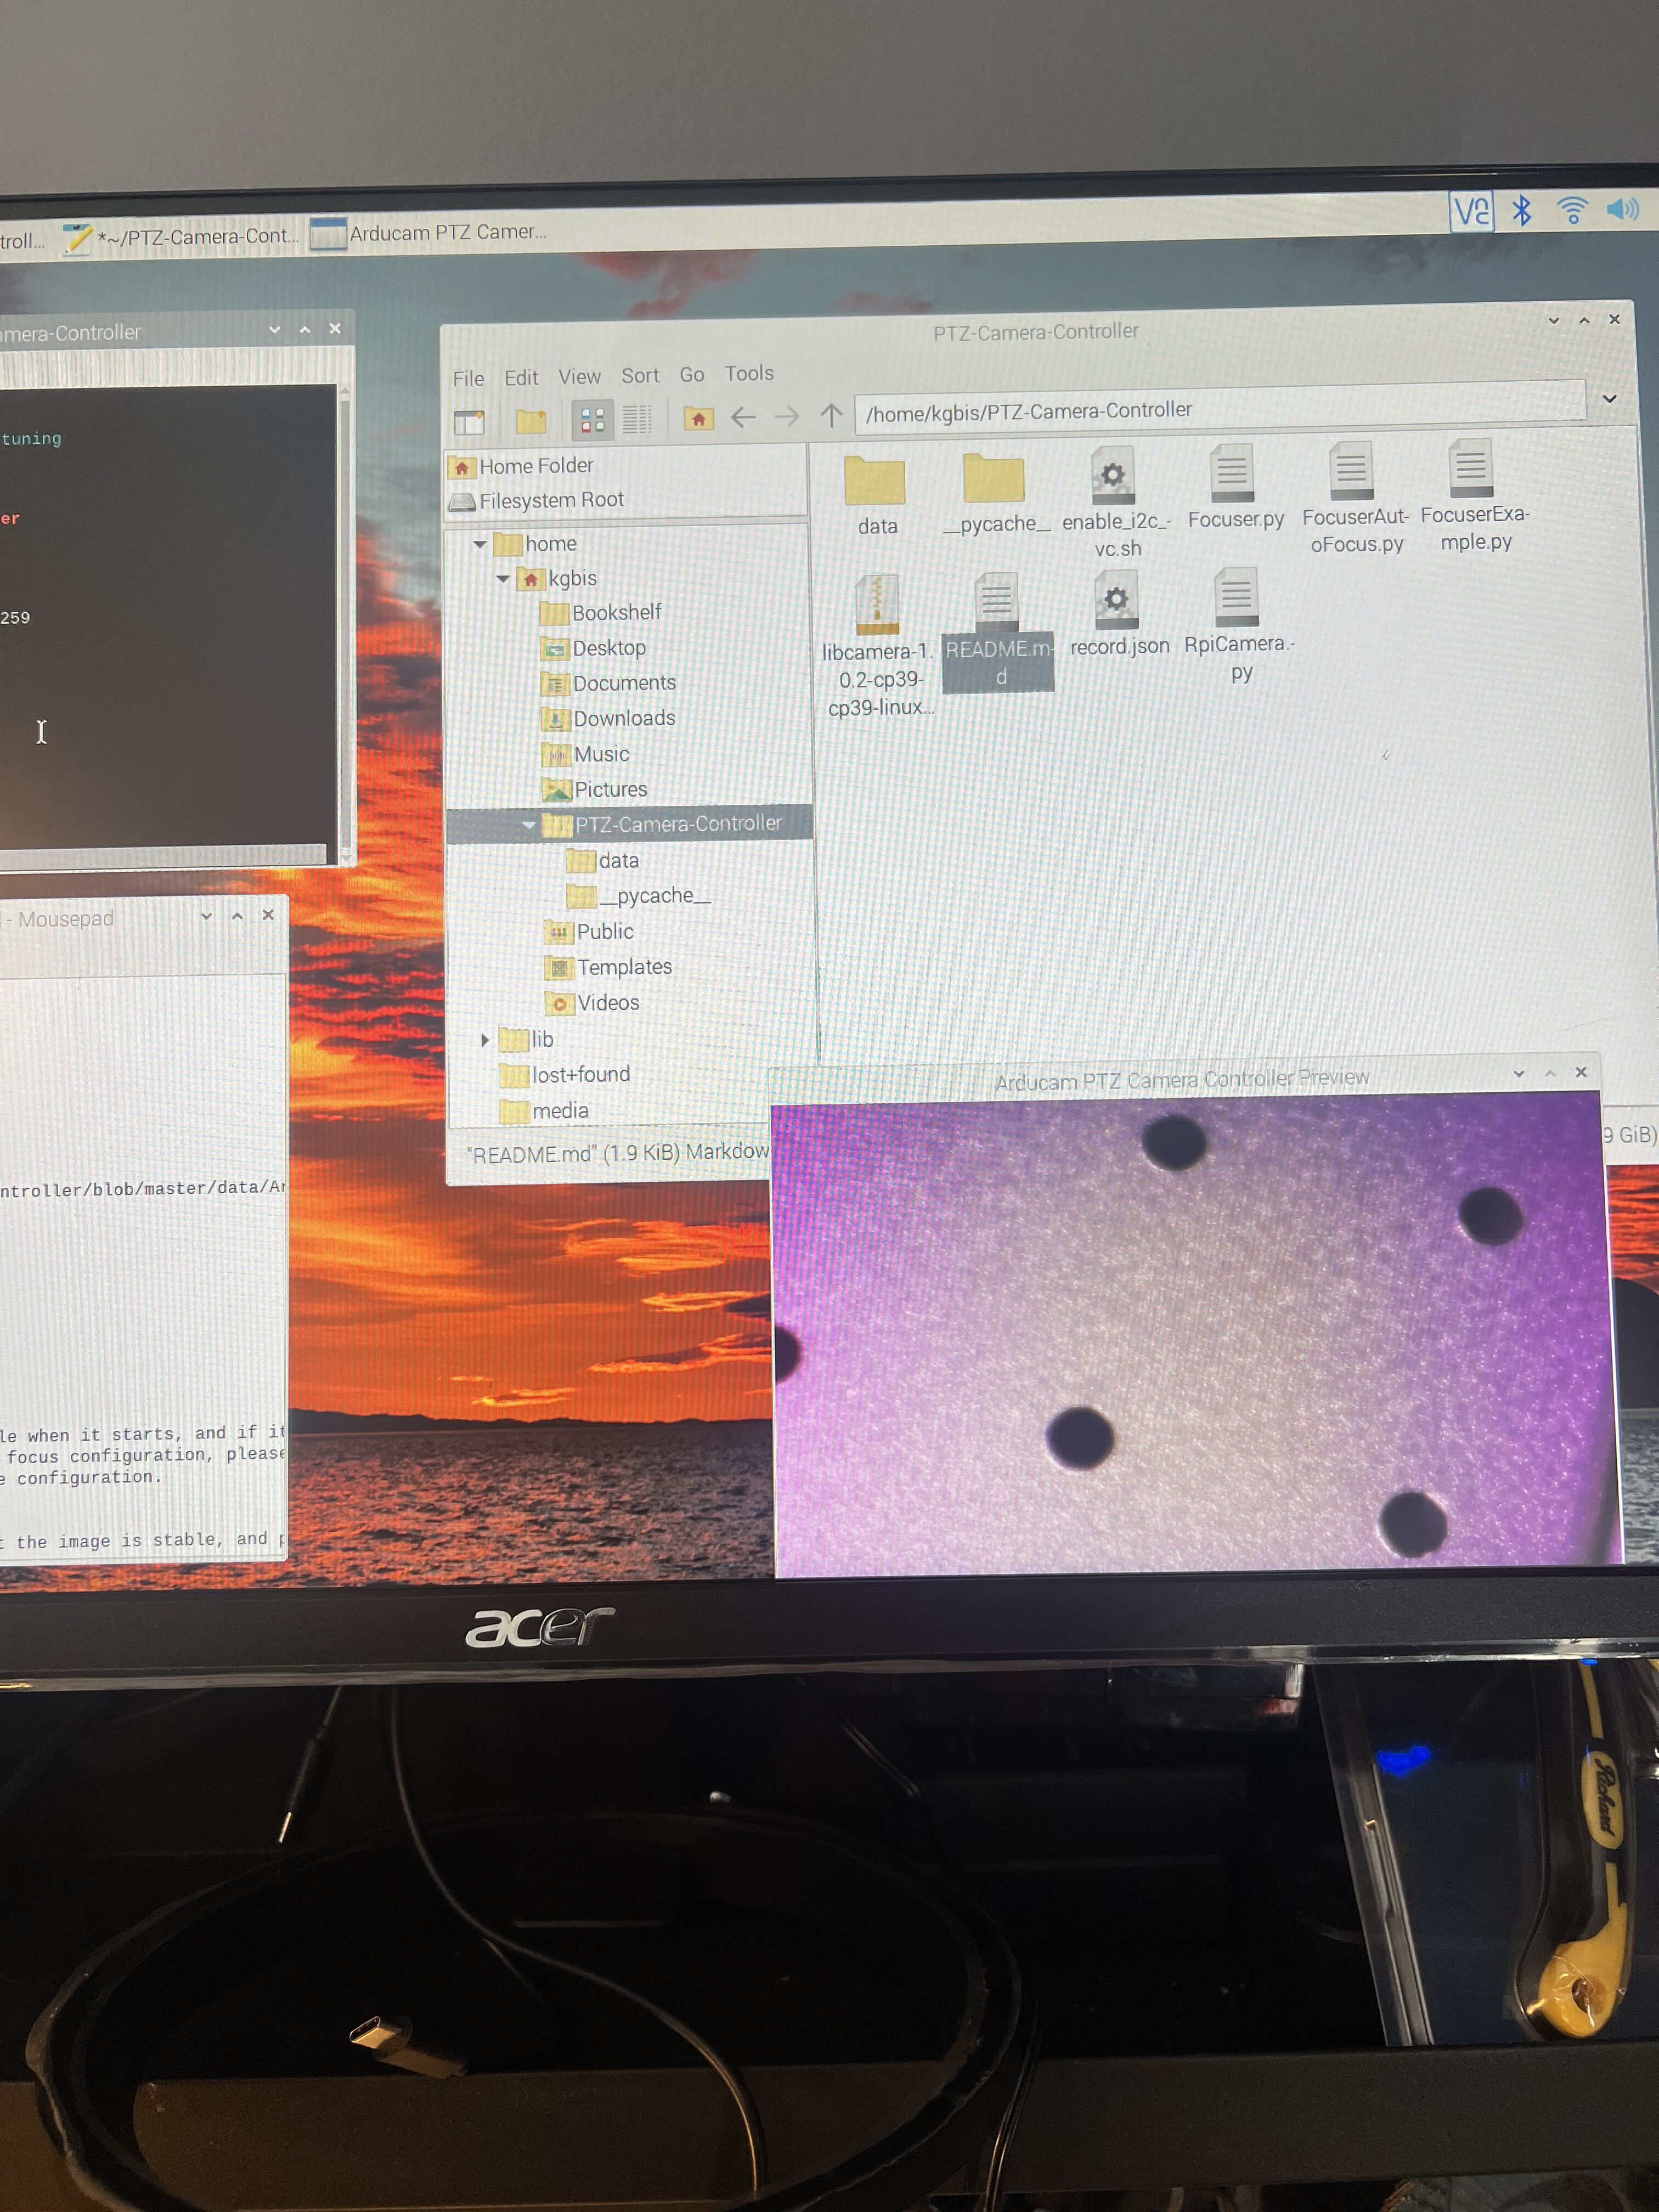
Ok, so finally got opencv to install with the sudo pip3 command. And then followed the readme documents to finalize the install. The Focuser Example program is working, well the servos don’t move. Or respond in anyway. The zoom and focus and it cut work.
The image is extremely out of focus, and pinkish or in general not right.
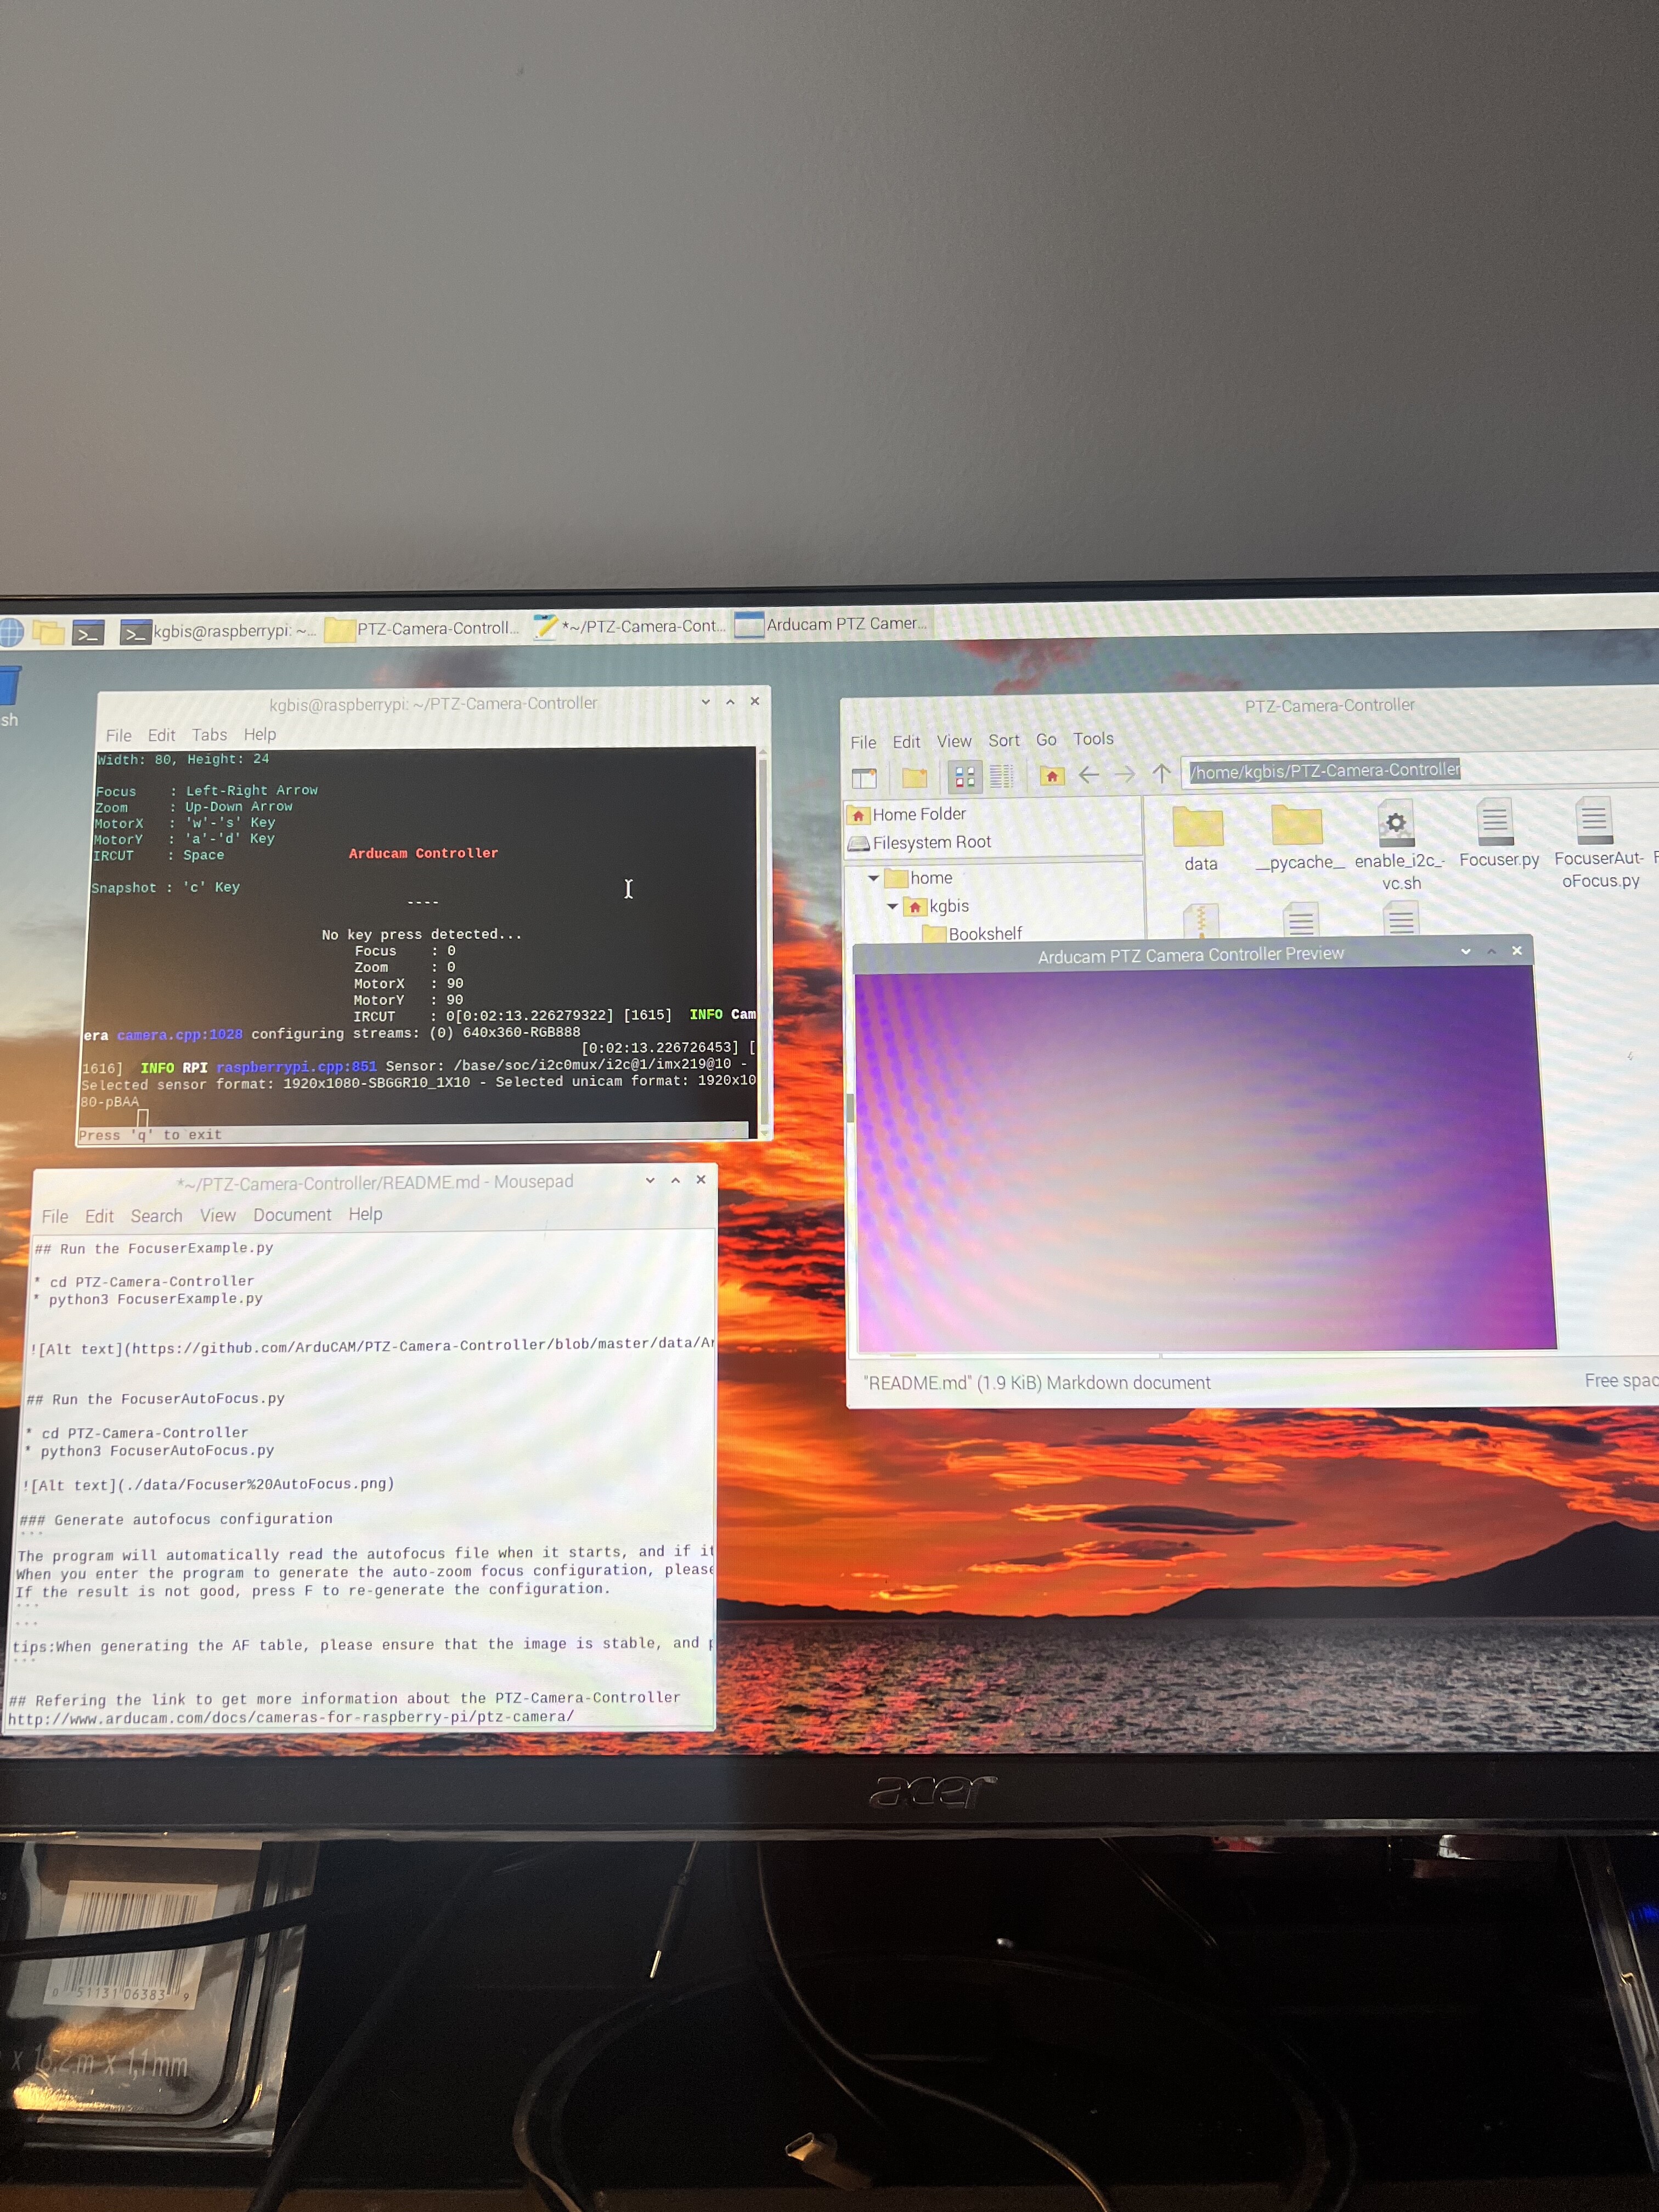
I know it can work as when I ran the auto focus program it ran and did produce an image of good quality. All be pinkish.
This is what I get when I run the list cameras and drivers and dev/video*
So this is all very positive. I will search the forums now for solutions to a pinkish or blurred image
Have you tried controlling the focus value with the keyboard in this program?
Pink is the reason for the ir-cut, which you can toggle with the space bar.(Everything keyboard responding needs to be done from the command line which I screenshot above.)
Yes sir, all the keyboard commands as described in the program, the servos still don’t respond. I tried the ir cut feature with the space bar and it works, I’ll give it another go tomorrow and use better lighting. But I could zoom in and then focus the image earlier. And the autofocus program seemed to respond better after I ran it afew times deleting the cached and record.json. But everything seems to be coming along. I see you have tuning files available, which one would be for the for the lens on the 8mp zoom camera?
These files can be tried
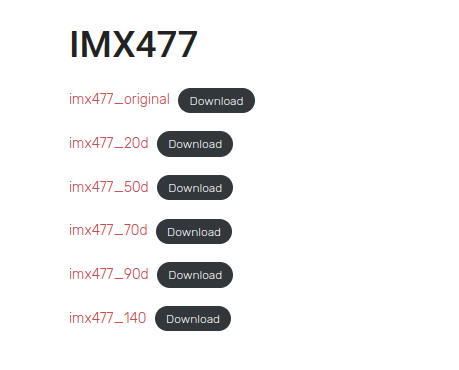
You can use this file if you feel that your image is not good, has problems like vignetting?
If your focus is not clear, you don’t need to use these files.
Thank you very much for the reply, I have one other question, is there a reason to use the IMX477 Tuning Files, when my sensor is a IMX219. or do I have it wrong and I really need to be installing the IMX477 Tuning file and dtoverlay.
Thank you again for your help and patients.
Sorry, my fault, I misread the camera you were using.
This is really a low-level mistake, I am sorry.
Your sensor is imx219, you should use the configuration of imx219.