Greetings,
I have the same problem. Not only is the image green but the frame rate is wrong and the calibration does not work.
I’m using: Raspberry Pi 4 4GB
I’ve purchased: Arducam 8MP Synchronized Stereo Camera Bundle Kit for Raspberry Pi
SKU: B0195S8MP
Your tutorial video shows the product with no green image. Also, it presents the 5MP and the 8MP camera for sale in the description. So it is perfectly acceptable to assume that this tutorial is for both 5MP and 8MP for the Raspberry Pi. The video: https://www.youtube.com/watch?v=eBZm40z7E8Y&ab_channel=Arducam
I’ve also read every webpage found in: https://www.arducam.com/docs/cameras-for-raspberry-pi/synchronized-stereo-camera-hat/sync-stereo-camera-hat-user-manual/#ftoc-heading-9 . Here states an introduction for the stereo camera pair (Sync Stereo Camera HAT User Manual). I’ve read and did everything that was instructed (except points 5.4.3 and 5.4.4 because they do not work for this stereo pair for some reason). Both 5MP and 8MP were introduced there.
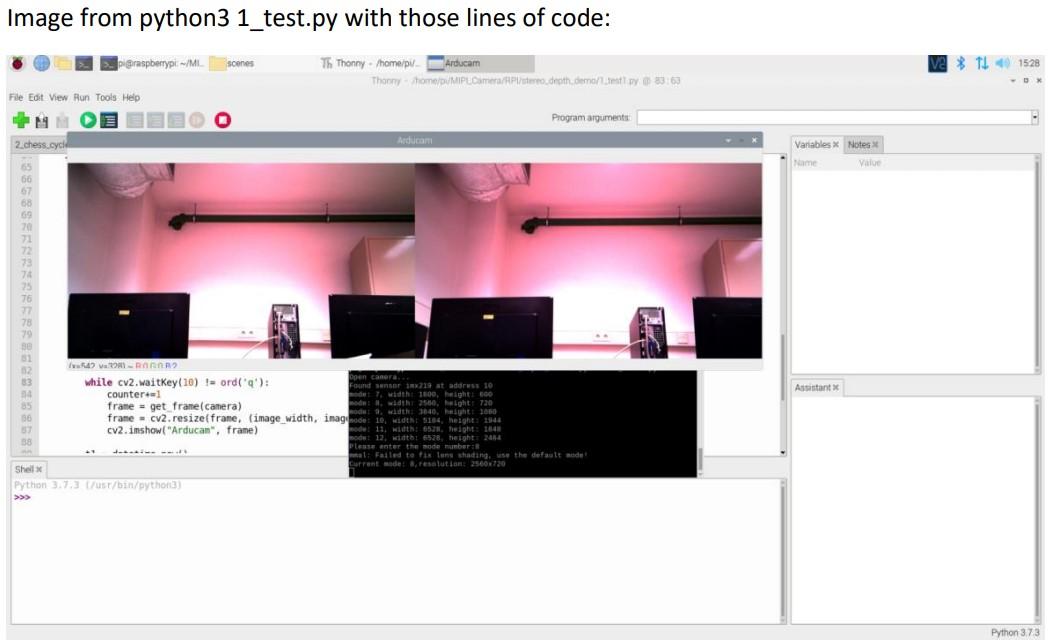
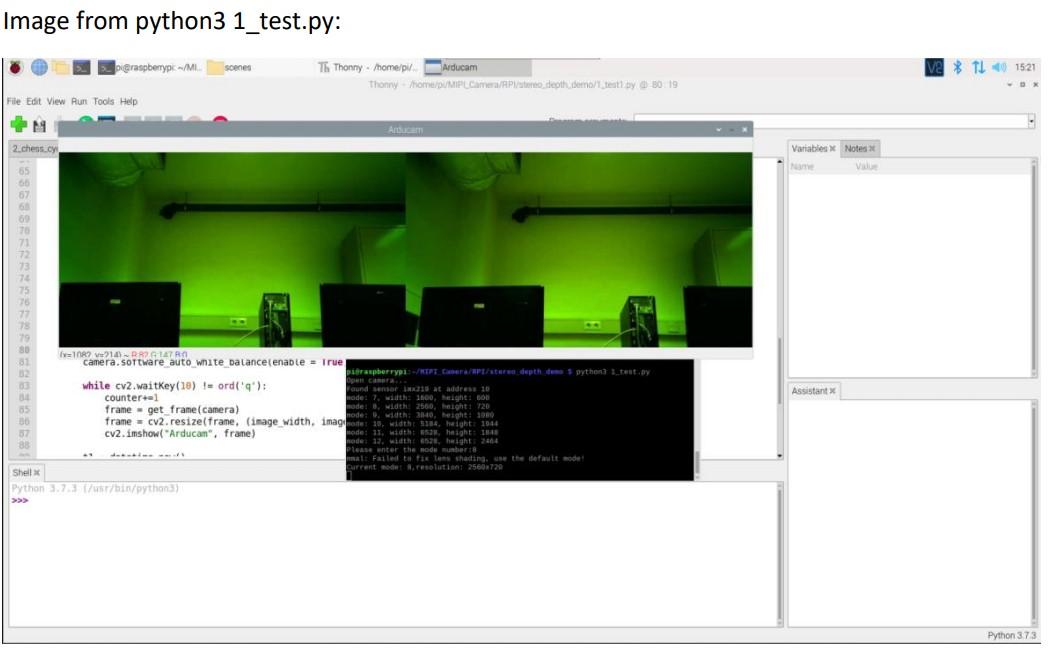
Then, I followed your instructions at: https://www.arducam.com/docs/cameras-for-raspberry-pi/synchronized-stereo-camera-hat/opencv-and-depth-map-on-arducam-stereo-camera-hat-tutorial/ . Running the first program (python3 1_test.py) shows a green image. If the reason is because of ISP or AWB and the algorithm is “suppost” to show a green image then why do you present a “regular” image in the youtube video? Does this not affect calibration??
While trying to fix the green image problem I added to the code:
camera.software_auto_exposure(enable = True) #Added this to adjust light
and camera.software_auto_exposure(enable = True) #Added this to adjust light
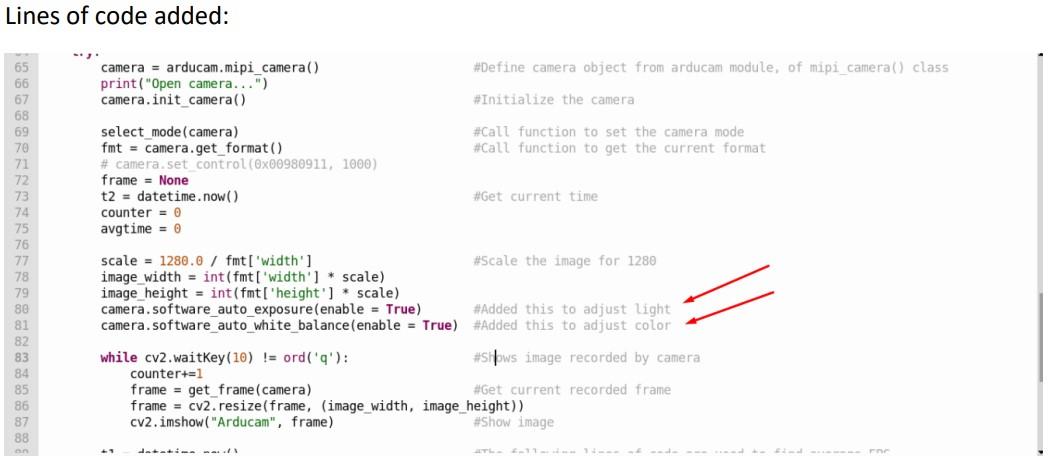
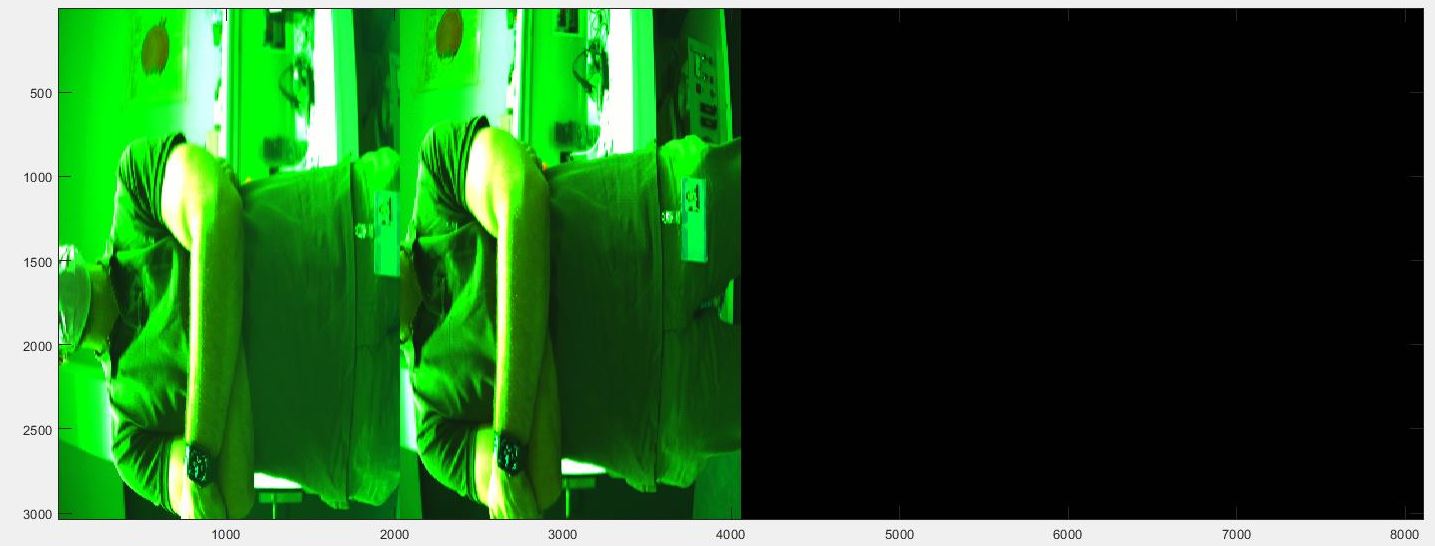
It gives a red/pink tone to the image but it corrects itself somewhat appropriately.

Not only that but the recorded frame rate is not what you present in the websites mentioned above. For example, for the 8MP and mode: 8, width: 2560, height: 720, 38fps. When I save the image with 1_test1.py it gives me an average of 17fps in the best cases and 12fps in the worst. Not even close to 38fps.

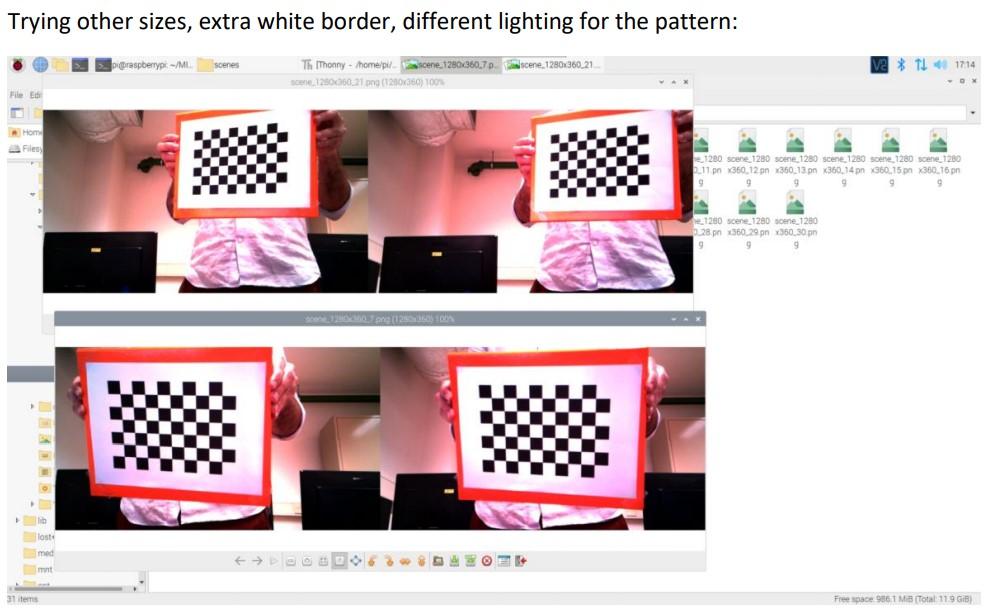
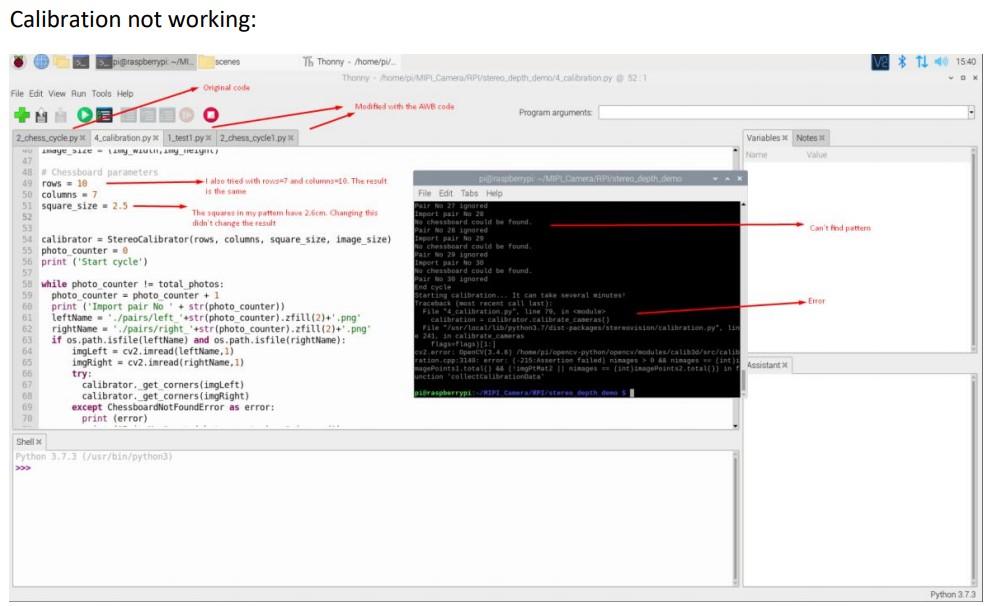
Lastly, after running 1_test.py, 2_chess_cycle.py, 3_pairs_cut.py and 4_calibration.py the algorithm can not find the pattern you provide. I tried changing the pattern parameters with no success.


Summing up the problems:
-
The image from Raspistill and Raspivid is much better when compared with what is presented by the Arducam software. Both the color and fps have drastic differences.
-
Points 5.4.3 and 5.4.4 of the initial tutorial do not work.
-
Green image problem
-
Calibration can not be performed because the pattern is not recognized.
It is not correct to present a product with results that are different from reality. It is unacceptable that a company sells a product that does not work. This is clearly a common topic in this product. However, before accusing anyone of anything I first recognize that I could be doing something wrong with some or all of these topics. Therefore, I’ve sent and email nearly two weeks ago but got no answer. Even creating an account in this forum was problematic and made me use two emails! Please tell me a good way to communicate with you to solve this as, so far, I have a something that clearly does not work. I’m available any day at any time and I more than willing to report problems/bugs to help you develop this amazing product.
Thank you for your time.![]()
Best regards.