Arducam_64mp autofocus via picamera2

@DaveMcD

Regarding usage, you don’t have to worry about it in the future. After 0.0.12, our usage has been synchronized with the official ones, and we will not change unless there are major changes in the official ones.

For the latest update, you can refer to the link below
https://docs.arducam.com/Raspberry-Pi-Camera/Native-camera/Libcamera-User-Guide/#for-arducam-16mp64mp-autofocus-camera

Thanks Edward. Is there a documentation update that describes the units used in the focus distance changes. It used to be the reciprocal in meters as far as I understood. i.e
–lens-position 5
would have been 1/5 (0.2m)

What are the numbers in relation to now?

@DaveMcD

The scope has been changed, please see my post below for details:

In fact, this value is used to control the size of the motor current.
For all the updates later, I will write them in the document, and it will get better and better.

Thanks Edward. Is there any description though of how those numbers correspond to real world distances?

I get that they map from one value to the other but I can’t find info on what either of those numbers are measuring.

@DaveMcD

Sorry, we don’t have an accurate correspondence table yet.
At present, if you want to know the specific correspondence, you can only measure it yourself.
This may be a plan we need to do in the future.

Apologies, but I dont find that to be a particular useful answer.

How would you suggest I derive what numerical values I need to enter into --lens-position to match a real world distance from the lens?

Your link to the other discussion mentions remapping values in a Json file but there isn’t an indication of what we’d be remapping from and to. Perhaps it makes immediate sens to software developers familiar with the source etc but for users expecting to be able to use the devices very of little of that makes sense.

Is it expected to use lens position that we need to modify that Json file and remap it? We’d need to know what those values represet in practical terms to the lens to know what we’re modifying and why?

Say I stick with the Json values you mentioned [0.0, 0 ,15.0,1023]

One explanation I can guess is that I have float values between 0-15 to play with and the device is really using 0 - 1023 potential distance steps it can make? so 0 being infinity focus distance ( most cameras this usually means after 10m or so it stops being relevant)? 15 being the closest focus distance?

If this is the case then 0 would equal 10,000cm and 15 probably ~15 cms closest focus. So my math might be off here but my calcs say that a focus distance of 1 would be 65.7cm

I certainly wasnt getting feasible results like this when I tested using 0.12 earlier this week. All the focus values seeimgly did very little and I ended up downgrading to 0.11

If my assumptions about how these values work is wrong then if you could indicate a practical example using correct values then that would be very useful.

@DaveMcD

I understand what you mean.
We are also currently working on the specific measurement method, I would say this is an ongoing research, please be patient, if there is an update, I will reply in this thread.

I’ve been pulling my hair out over the past week trying to get these cameras to work. Is it safe to assume that following the instructions in Edwards latest update link is the path to Arducam nirvana? After screwing around with this and not getting any results I plugged in a USB webcam and it came right up. Pretty strong argument for ditching Arducam altogether and going with a standard webcam. In fairness I am not a programmer so I don’t understand a lot of what is being said here. However, I am certainly able to type command lines into my Pi and would REALLY like to get this working.

1 Like

Link to another thread where I’ve listed the working and broken commands I’ve experimented with and my notes on those.

@RavenOne

Please don’t worry, you can talk about where you have a problem in detail so that I can help you find a problem. Or I can help you solve this problem remotely, or if you want, we can also have a meeting to talk about, please give our products more patient and trust.

@DaveMcD

I saw you said in your post that you cleared the buffer manually, how did you do it, can you share it? Thank you.

@Edward

There’s a chance I’m mistaken about how it worked but if I ran a command that had no preview then subsequent full resolution commands with a small preview would work.

So I was running

libcamera-still -t 1000 -n

Without any extra commands.

1 Like

@DaveMcD

Anyway, thank you for your contribution.

In fact, libcamera allocated the buff when previewing, but for some reason, the buff allocated by the preview before switching the resolution to save the image was not cleared. I may need to do more research.

1 Like

Hey Edward, thanks for responding. And I greatly appreciate your offer to assist…a sign of good customer service! However, I’ve already returned the cameras and am sticking with my webcam for the time being. I’ll continue to follow things and will try them again once I hear that the Arducams are “plug and play.”

1 Like

I did some research a while ago, but were not really proven.

Hi everyone, thanks for everyone’s continued development on this. One of my jobs i was working on decided to quit using the Arducam because we were spending way to much money on development time to get it working :frowning: , but i have another couple projects i’m still trying to get it working. so still hoping for the day I can actually use it to do the things it should do (take 64mp photos that autofocus)

In a couple days Im going to go through my RPI4 Quad-Cam setup and just start from a fresh image
@Edward , what guide or forum thread should i follow to best get things working with starting from scratch again.

@hikinghack

You can learn from this, which contains some questions I sorted out.

You can also operate according to our official website documentation.
https://docs.arducam.com/Raspberry-Pi-Camera/Native-camera/Quick-Start-Guide/

If you want to develop with code:
https://docs.arducam.com/Raspberry-Pi-Camera/Native-camera/PiCamera2-User-Guide/

1 Like

Hi, im sorry this still isn’t very useful. I really really really would just like to be able to take high resolution photos with this camera setup i purchased from you all, and it’s incredibly disappointing that I can not do the basic things.

If we can get ANY KIND of basic workthrough that results in a person with a fresh Pi4 being able to take 64mp Autofocus images, i will be thrilled, and I will share and document the exact process. But right now, I am not sure if this exists. And pointing to a couple of half-completed walkthroughs and then basically saying “then read the entire forum for troubleshooting” isn’t great :frowning:

Here I will guide you through exactly what I did from a fresh image based on the links you just sent here and show you how it is not adequate for your customers (even advanced customers, doing all sorts of hacking to get it working!)

A) Install
So first Installed the latest Raspberry Pi OS 32Bit
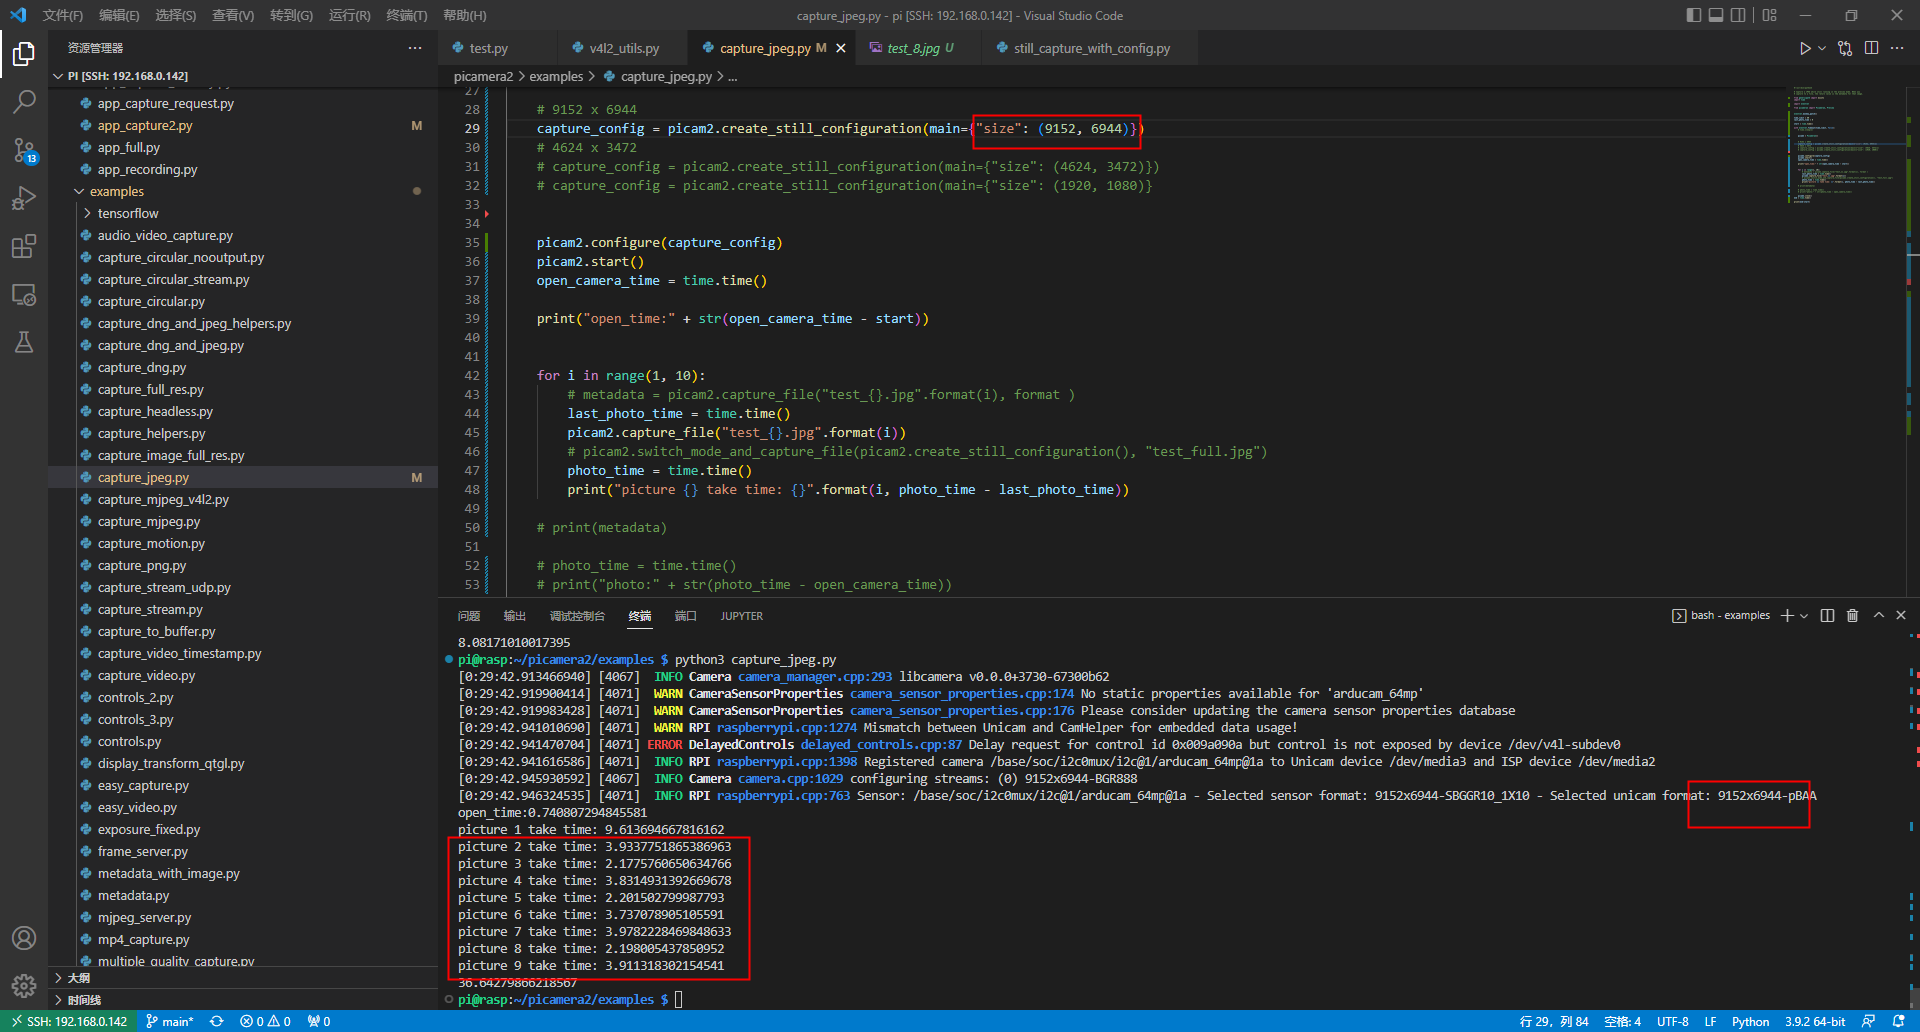
it’s a headless configuration set at 1024x768
Please note that to make the cameras work though i have to go into raspi-config and
Choose “Enable Legacy Camera”
There is a problem though that when you do this, for some reason Raspberry pi won’t display a headless image.
So then one must
edit config.txt with sudo nano /boot/config.txt
and choose
hdmi_force_hotplug=1

B) Arducam Quickstart guide
next, i follow the quickstart guide you sent
https://docs.arducam.com/Raspberry-Pi-Camera/Native-camera/Quick-Start-Guide/

Hey this was quick and simple, and by the second to last step

libcamera-still -t 5000

That totally works and i can preview the image

If i run the next command though and actually try to save an image, it totally crashes :frowning:

libcamera-still -t 5000 -n -o test.jpg

(Crashes :frowning: )

…skipping ahead after a long time messing with this, i had to find that i still needed to set

dtoverlay=vc4-kms-v3d,cma-512

so that after running cat /proc/meminfo
my
CmaTotal: 524288 kB

in order to save a photo. (This should be a step in the "Quick Start guide if you want people to actually be able to run the commands you say)
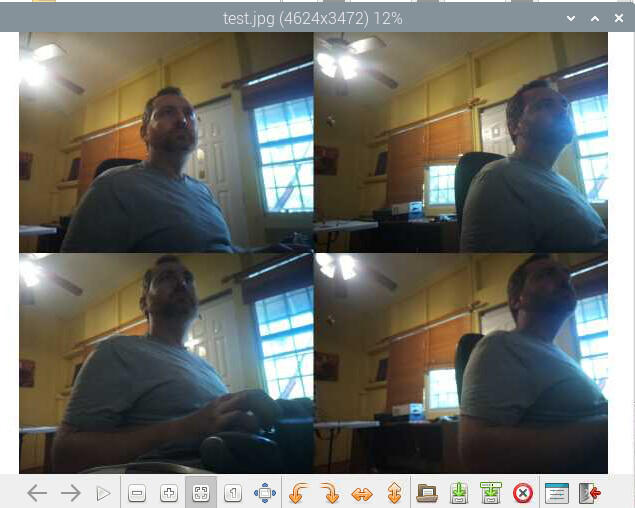
so now I can run

libcamera-still -t 5000 -n -o test.jpg

and i get a file!

unfortunately it is not a full 64mp, but that’s ok, because i can learn independently how to set the libcamera myself

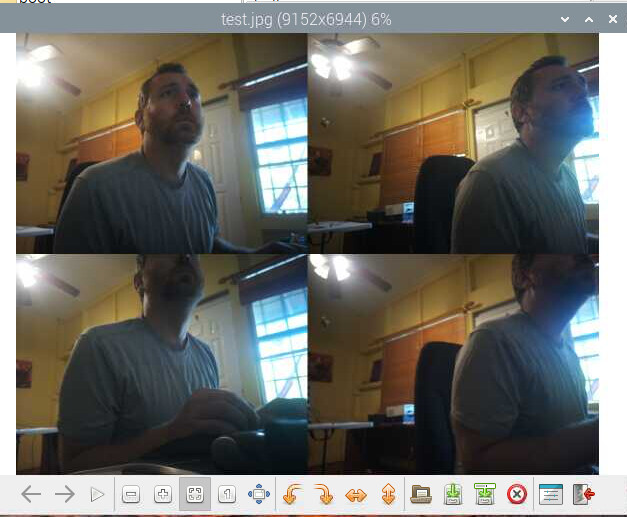
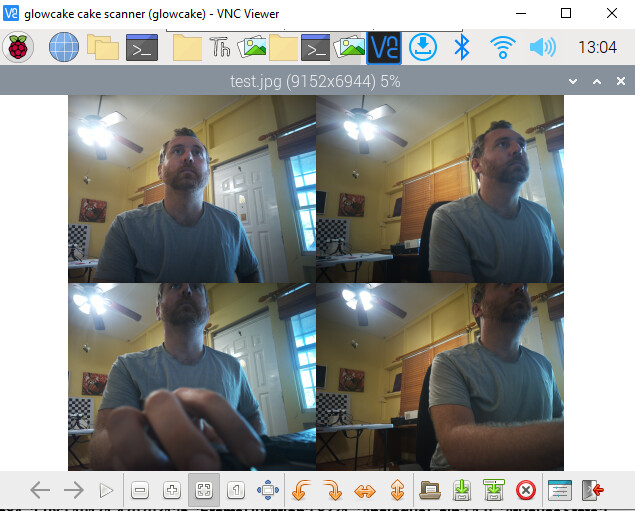
libcamera-still -t 5000 -n -o test.jpg --width 9152 --height 6944

and voila! I have a 64mp photo!

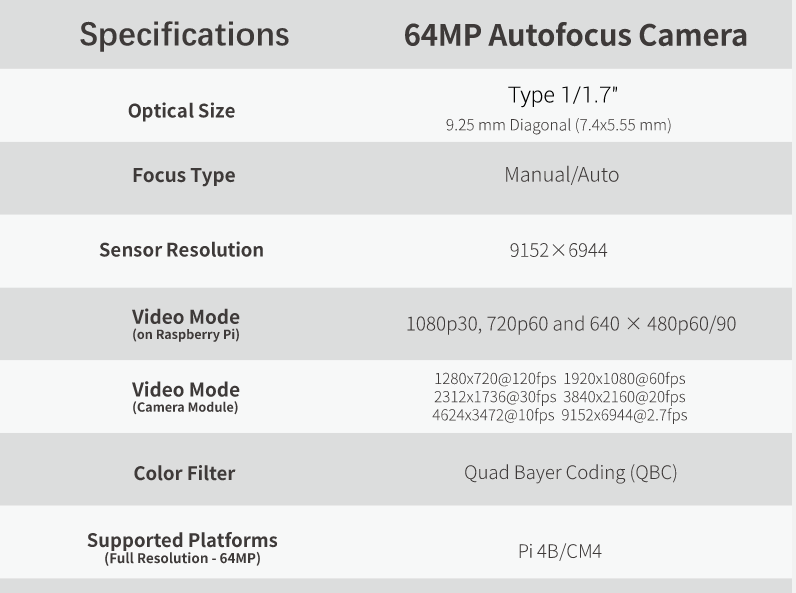
Now this photo takes a full 16 seconds to actually take (even after i remove the -t 5000)! (which is wayyyyyyyyyy below the performance you all list when people purchase this camera that says the camera can do 2.7 fps at 64mp which feels pretty misleading, but hey at least we got a photo!)

Cool, so we are halfway there, if i can now autofocus the camera and then take a photo I will be as happy as a clam!

C) Picamera2 and autofocusing
So i follow the next link
Picamera2 - Arducam Wiki
and run all the commands to get picamera2 working on the machine

but when i run the example
i get a preview window showing the cameras, but no focusing because an error pops up:

raise RuntimeError(f"Control {name} is not advertised by libcamera")
RuntimeError: Control AfMode is not advertised by libcamera

i also then try to run some libcamera commands from the command line like in this link you all have

https://docs.arducam.com/Raspberry-Pi-Camera/Native-camera/Libcamera-User-Guide/#for-arducam-16mp64mp-autofocus-camera

all of those commands run and don’t throw any errors, but also the focus never changes and I always get an error list that gives lots of i2c errors and such.

glowcake@glowcake:~ $ libcamera-still -t 0
Made X/EGL preview window
[0:06:26.217361021] [1415]  INFO Camera camera_manager.cpp:299 libcamera v0.0.0+4186-d1dc0373
[0:06:26.221403401] [1417]  WARN CameraSensorProperties camera_sensor_properties.cpp:205 No static properties available for 'arducam_64mp'
[0:06:26.221529438] [1417]  WARN CameraSensorProperties camera_sensor_properties.cpp:207 Please consider updating the camera sensor properties database
[0:06:26.221683605] [1417] ERROR V4L2 v4l2_device.cpp:92 'dw9807 10-000c': Failed to open V4L2 device '/dev/v4l-subdev1': Invalid argument
[0:06:26.221765438] [1417] ERROR CameraSensor camera_sensor.cpp:501 'arducam_64mp 10-001a': Lens initialisation failed, lens disabled
Ioctl read i2c error:: Remote I/O error

And so that’s where I am at. I can take photos, but i cannot change the focus at all

update: I can now
Take 64MP photos after AUTOFOCUSING!
hooray!

I will post my full process in a separate thread so folks can finally have a step by step guide of how to get this thing going without having to hunt down different troubleshooting steps all over the forum.

But in short, the only difference from what I did above is that I, once again, created an entirely clean new image, but this time

  • i added “sudo” to the beginning of ALL commands, and
  • after turning off the pi, i completely powered down the entire pi (instead of a soft reboot)

for some reason this got rid of my errors with the i2c now showing up.

The only downside though is that now, after adding this line

dtoverlay=vc4-kms-v3d,cma-512

my pi will only run at 640x480 resolution (no matter what I specify!)

so that’s strange. but ill share everything soon

1 Like

@hikinghack

In fact, using libcamera directly, every time you save an image, you go through many steps (configure the camera, turn on the camera, set the controls, acquire data, save the image, turn off the camera).

I have done related tests, you can refer to the actual time required.

It did take a lot of time for the first initialization, but it stabilized at 2-3 seconds later

You can try this code, it was tested a long time ago, so I can’t find the code. But the rest are comments and library imports, you can try it through the code in my screenshot (you need to add the code to import the library yourself).

UPDATE
so in order to use the rpi in headless mode i had to uncomment

hdmi_force_hotplug=1

but then once i enable

dtoverlay=vc4-kms-v3d,cma-512

the headless VNC mode will only be 640x480

to solve this, one just needs to go back and re-comment out the

#hdmi_force_hotplug=1